Having discovered many American treats and delicacies since our arrival I was delighted to hear that the traditional Christmas mince pie is a bit of an unknown to my Stateside friends.
Having been massively inspired by a cracking meal at Ping Pong in London, courtesy of (the soon to be) Mr and Mrs Barnes and Katie Wheeler, I wanted to try my hand at Dim Sum. I have also had massive cravings for it and quaint though my parent's Sussex cottage is, it is not local to anything much beyond the local pub and a post box. (The pub doesn't do Dim Sum).
Perfect as a light lunch on a chilly day. Also, feeling a little under the weather, I was craving something good and comforting with some healing protein.
I love sausages but always feel a bit funny about not
knowing what’s in them, I know there are some really good quality ones out
there but if I can make my own I will!
With Halloween upon us you may well find yourself elbow deep in a pumpkin. In the States it's not unheard of to eat pumpkin (the Sugar variety rather than the Jack... oh yes I am well informed) but back in Blighty, where I currently find myself, it's not top of the menu.
Having recently been told about roasting pumpkin seeds as a snack, by a farmer from Jaswell Farm in Johnston, RI, I wanted to post this idea of mine.
This little recipe makes use of a bit of the waste any Pumpkin patron will have this year, whether you eat the flesh or not.
As the title suggests, you can use any squash seeds for this. The seed you see above are butter nut squash seeds.
Ingredients:
The seeds from your pumpkin or squash
Coarse sea salt
Fennel seeds
The amounts you will end up using will depend entirely on how many seeds you start with- I used the seeds from one small (600g) butternut squash.
Method:
After scooping the seeds out of your squash, wash away all the fibrous, stringy bits until you have just the seeds.
Pat the seeds dry and scatter on a baking tray- do not add oil.
Add a teaspoon of coarse sea salt to a pestle and a tea spoon of fennel seeds, pound until they are smashed but not a fine dust.
Add the fennel salt to the seeds and roast in an oven at 190c for 10 minutes.
The fish counter at the local market to us in Providence is
incredible, the variety, quality and size (as with most things in America!) is
outstanding.
I’m desperate to start experimenting with cooking live
lobster and sampling some of the local clams and seafood but the plump, pink
salmon caught my eye on this trip and I just couldn’t resist.
Ingredients: To serve
two people
For the salmon-
1 portion of salmon fillet per person- the size of which
depends on personal preference, the ones I was presented with when asking the
fishmonger for an individual portion we’re huge as you can see! Also ask the
fishmonger to skin the fish unless you’re happy to do it yourself.
2 teaspoons of creamed horseradish
3 tablespoons of breadcrumbs
Salt and pepper
Spray olive oil
For the herby potato
salad-
10 new potatoes
1 tablespoon of butter
4 heaped tablespoons of sour cream
1 handful sized bunch of fresh dill
½ handful sized bunch fresh parsley
10 spring onions/scallions
Salt and pepper
Start by getting the new potatoes on to boil, chop each potato
in half and tumble into salted water. Bring to the boil then turn the heat down
to simmer- leave them to cook whilst you prepare the salmon.
If your fishmonger has not skinned your fish or you’ve
bought pre-packed skin on fillets you need to take this off. Place the fish on
a steady board skin side down, using a very sharp (non-serrated) knife stroke
the fillet very gentle with the blade where the flesh meets the skin on one
side. When there is enough skin separated from the fillet for you to grasp a good
hold of it (about half an inch) hold the skin very firmly and continue to
stroke the knife between the flesh and skin using the skin to guide your knife.
As long as you hold the knife blade flat against the skin you will not lose any
flesh of the fillet- the skin is quite tough so use it as a guide for the knife
until you reach the end.
When you have your skinless fillets, cover the skinned side
with a teaspoon of horseradish, but just on this skinned top side. Sprinkle the
breadcrumbs onto a plate and season them well, then lay the fillets of salmon,
horseradish side down, into the breadcrumbs and gentle pat them into the crumbs
to ensure they stick. Lift and replace the fillet a few times to ensure it’s
well covered with the breadcrumbs. Spray a little oil over the breadcrumbs (it’s
easier to use a spray than a drizzle of a bottle as it gives a very light
coating) this will ensure the fillets have a lovely golden crumb when baked.
Place the fillets onto a non-stick baking tray or one lined with baking paper pop
into a preheated oven at 180c for about 15 minutes for a regular sized portion
of salmon- less for a smaller size or a little longer for the mammoth American
sized fillets I used.
Check the potatoes by skewering them with a fork, they need
to be yielding but not completely soft as you would cook them for mashed
potato. When they are soft enough for a fork to stab them but still firm,
remove them from the heat and drain. Let them steam in the colander whilst you
chop the herbs.
Finley chop the dill and parley and finely slice the spring
onions up to where the leaves turn dark green and dry- discard these top parts.
Tumble the cooked potatoes into a large mixing bowl with the butter, use a fork
to crush but not mash the potatoes, you want a consistency that is lumpy and
uneven with some whole chunks of potato and some smooth mash. Dollop in the sour
cream and sprinkle over the herbs then mix well, taste and season.
You can check the fish is cooked by using a dinner knife to
cut into the thickest part of the fillet, if the flesh flakes and is a light
opaque pink then it is done. Be careful not to overcook the fish though, as
soon as it is pale pink and not translucent it is ready.
To serve, pile a portion of the potato salad onto a plate
then place the salmon on top, aside from looking nice this means the juice form
the salmon runs into the salad and warms it with its heat making the flavours
of the herbs really come alive.
This goes down particularly well with a really crisp white
wine on a sunny summer’s evening!
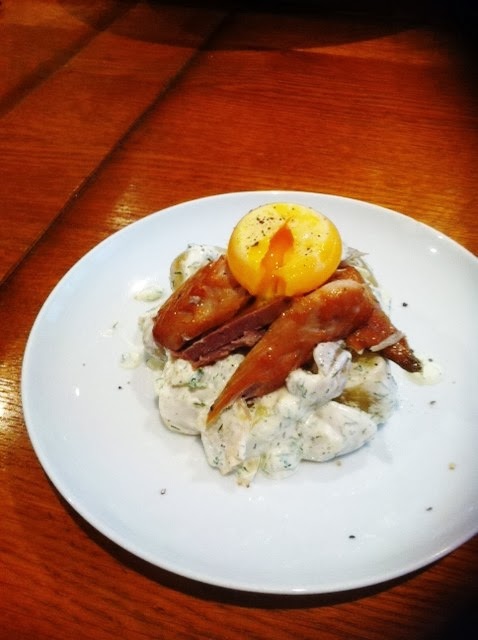
With it being really hot and muggy here in Rhode Island at the moment I’m mainly preparing and eating cold meals. That being said I have also been having a bit of a craving for a good old bacon sandwich with some proper ketchup- not the acidic cheap watery stuff that seems to be everywhere. So this is my nod to the great bacon sarnie in a hot and humid weather friendly form.
This recipe made one small terrine that would have served two people for a lunch or four people for a starter.
Ingredients:
For the pate-
8 oz white mushrooms
2 tablespoons butter
1 clove garlic
12 oz streaky bacon plus extra rashers to wrap the terrine- how many will depend on how large your terrine is and what shape it is
½ cup double/heavy cream
2 egg yolks
Salt and pepper
For the chutney-
4 plum tomatoes
½ cup jam sugar
1 tablespoon red wine vinegar
Salt and pepper
Method:
Finely chop the mushrooms and garlic and fry them in the butter until soft. This might seem like a huge amount of butter but if you think it’s going to be split amongst a few portions it’s not so bad- I also find that when I use this pate I don’t need extra butter, I just spread it straight onto toast or bread.
Whilst the mushrooms fry, slice away any rind that’s it on your bacon, keep all the soft white fat on it, this will keep the pate moist and spreadable.Do not cook the bacon!!!
Pour out the cooked mushrooms onto a large plate and spread then out to cool, pop them in the fridge to cook them faster.
Once the mushrooms are cool, add the raw bacon, cream, egg yolks and salt and pepper then blend into a thick paste. To check the seasoning take a small teaspoon amount of the mixture and fry it until cooked, this will not be the texture of your finished pate but it will give you and preview of the flavour so you can adjust the seasoning.
Once you are happy with your seasoning, line the dish you wish to cook the pate in, I used a large round ramekin for the size of pate I was making but if I were to make a larger pate I would probably use a terrine dish or ‘loaf’ shape dish so I could cut it into slices to serve.
Line the dish with the bacon you have kept aside, how you do this is really up to you but make sure you either leave the end of the bacon stripe hanging over the sides so you can fold them over the top of the pate or save a couple of strips to cover it. Spoon in the pate to the dish, smooth it down with the back of a spoon and gentle bang the dish against the counter to push any large air bubbles to the surface. Fold over to place more bacon over the exposed top of the pate then bake in the over at 180c in a bain-marie for about 45 minutes- longer if you pate is larger than the one I have made here.
To make a bain-marie simple put your pate dish into a large baking tray with high side and fill with warm water so that it reaches about halfway up the side of your pate dish.
To check if the pate is cooked through, insert a skewer or knife to the centre of the pate and if it comes away clean then it is cooked. The pate won’t be ready for another couple of hours as it needs to be pressed and cool fully before the texture is as it should be.
Cover the pate with something flat that fits the pate dish well, a plate if you have made a round pate or if you can’t find anything suitable then cut out a sheet of thick card and cover it well in foil. Cover the pate with your ‘press’ and place heavy objects on top evenly to spread the weight, cans and tins work best. Place the weighted pate in the fridge to completely cool, its best left over night.
If you try and eat it before it’s completely chilled the texture will feel grainy and it won’t spread well the flavour will not be as it should either.
To make the chutney, quarter and deseed the tomatoes before cutting into large chunks. Place in a saucepan on a medium high heat and add the vinegar, sugar, salt and pepper. Bring the pan to the boil and stir until the sugar has dissolved then turn down the heat and allow to simmer gently for about 20 minutes or until the tomatoes have broken down and the texture is of a thick, shiny paste with a few tomato lumps in it.
Pour the chutney into a clean glass jar and secure the lid whilst the mixture is still hot, then set aside to cool. The chutney will keep is unopened for a couple of weeks, once opened keep in the fridge and use within 5 days.
To serve, removed the bacon covered pated from its terrine dish only when it is completely cooled and set. Heat a large, dry frying pan to a high heat and sear the bacon wrapping of the terrine so that it is crisp, you want the pan to be incredibly hot as you don’t want the pate to be in the pan long enough for the pate centre to heat up- just to crisp the wrapping.
I serve my pate with toast (marbled rye in my case) and the tomato chutney- you won’t need butter on your toast as the bacon fat, cream and butter in the pate means it is beautifully smooth and moist.
I was wondering the aisle of the supermarket the other day
and snuck a little taste of this dip (it was a free sample- I haven’t turn to a
life of petty, food related crime). It was delicious (aside from the suspiciously
lengthy expiration date and assurance it doesn’t need to live in the fridge) so
I had to whip up some homemade as I’m a not a huge fan of ‘fresh’ things that
stay ‘fresh’ for longer than a week… unrefrigerated.
Also if you stop halfway through this recipe you have
homemade mayonnaise which can be flavoured with all manner of things so really
this is a two in one recipe!
Ingredients:
1 egg yolk
Juice of half a lemon
1/2 tsp white wine vinegar
1 cup olive oil
2 handfuls of fresh spinach
1 clove of garlic
1 inch square chunk of parmesan
1 jar of artichoke hearts in oil (about two whole hearts)
Method:
Before you start its best to know that making mayonnaise is
an incredibly delicate operation, as a child of the whack it all in a mix it up
school of cooking mayonnaise has been a bit of a nemesis of mine. But be
assured that when it does finally work and you get the hang of it there is
nothing more satisfying than serving up homemade mayonnaise- if you don’t get
loads of compliments (even a standing ovation) don’t let anyone have it... they
don’t deserve it.
Firstly mix the lemon juice and white wine vinegar in a cup.
In a separate, clean mixing bowl or in the bowl of a food processor with a
whisk attachment, whisk the egg yolk until it is very light in colour and has
aerated. Add half of the vinegar/lemon juice and whisk again, the yolk should
begin to puff up a bit more and thicken slightly, when it has thickened to the
consistency of double (heavy) cream add the rest of the vinegar/lemon juice and
continue to whisk until well incorporated and further ‘puffed’.
Now the oil, you will not believe (until you have poured
away 3 or 4 failed attempts) how slowly you need to add the oil, literally add
a drop and whisk for 3 or 4 minute, then another drop etc. Do this until you
have added about a quarter of the oil and the mixture is continuing to thicken
and lighten, once the mayonnaise is ‘stable’ and thick you can add a little
more oil but pouring and very thin, steady stream as the whisk is going but don’t
get cocky and splosh it in in one go. Mayonnaise does not appreciate cockiness.
Once all your oil is added and you have gloriously thickened
beautiful mayonnaise, pop it in the fridge to rest and cool whilst you prep
your flavourings. At this point I would not blame you for stopping and
celebrating a job well done, after all you will most likely have had to wash up
the bowl a few times to start again and this simple little dip is the last
thing you want to make. If you got it right first time then I salute you, or
you are lying.
Finely chop the garlic and spinach and fry in a little oil
on a medium heat until the spinach has wilted and is very tender. Chop the
artichokes finely but not into a mush, I removed any ‘petal’ stumps and just
used the heart flesh, as the petals are a bit to chewy to go in the dip. Finely
grate the parmesan then add all the ingredients to the mayonnaise and mix well.
The dip is really flavourful so you won’t want to pair it
with anything else too strong so serve up with plain, salted crisps or
breadsticks.
There is a fab Middle Eastern restaurant in Providence call
East Side Pockets (http://www.eastsidepocket.com/)
which has completely sparked my recent obsession with Middle Eastern style
dining.
Here’s my version of a complete Middle Eastern hero-
falafel.
Ingredients (I made 15 falafel from these ingredients)
Falafel-
1 cup diced white mushrooms
I small white onion
½ cup plain flour- plus a little
extra for dusting
1 can chickpeas (drained)
1 tsp sesame oil
1 egg
Zest of a lemon
1 tsp ground cumin
2 cloves garlic
Juice of half a lemon
A handful size bunch of fresh
coriander (cilantro)
Half a handful sized bunch of
fresh parsley
Oil for frying- I used corn oil
Salt and pepper
Cucumber yoghurt-
Half a cucumber (about 4 inches
long)
1 cup greek yoghurt
2 tsp dried mint
Salt
Method:
Finely dice your mushrooms, garlic
and onion and add to a frying pan with the cumin, gently fry in the sesame oil
until soft. Sesame oil does not have as high a smoking point as corn or
sunflower oil so be sure to fry on a gentle heat. Remove the mixture form the
pan and spread out onto a large plate then pop in the fridge to cool.
Drain the chickpeas well and pour
them into a large mixing bowl. Finely chop the parsley and coriander (cilantro)
then add them to the mixing bowl along with all the other falafel ingredients.
When the mushroom and onion mixture is cool add this as well.
A lot of falafel recipes call for
blending of the ingredients or mashing them to make a smooth paste, there is
nothing wrong with this and you will still get a beautiful flavour but I’m a
fan of texture. Using your hands, scrunch the ingredients together and mash
with your fist to create a well texture mix that have some whole chick peas,
some crushed ones and some smooth paste. This means that when you fry the
falafel the ingredients that have been reduced to paste will hold the shape of
the patties but you’ll still have some good bite from the whole ingredients.
Spread a little flour on a plate
and make your falafel, scoop a tablespoon sized portion on to your floured hand
and roll into a ball, then flatten so it’s about half an inch thick. If the
falafel gets a bit stick, dab you palm onto the floured plate. Repeat until all
your mixture has been made into patties, heat your frying oil in a large pan,
you are not deep frying these falafel but you do want a nice crisp shell so
glug in enough oil so that it will come about a quarter of the way up each
falafel.
Fry the falafel for about 2
minutes on each side until they are a beautiful golden brown, then set them
aside on a plate covered in kitchen towel for the excess oil to drain off so
they stay crisp.
You can serve these up straight
away or pop in the fridge to keep for a few days, they can be eaten hot or cold
and can be reheated in a dry pan by dry frying for about a minute on each side
on a medium heat.
To make the yoghurt sauce, peel
the cucumber and cut it in half lengthways. Use a teaspoon to scoop out the
watery seedy inside then chop into large chunks, pop in a mixing bowl (or
regular blender) with the yoghurt, salt and mint and blend away- I used my
trusty stick blender!
Serve the falafel up simply with
the yoghurt sauce or in an oven warmed pitta or with feta cheese and tomato
relish (see my relish recipe later in the week!) for an exciting vegetarian
alternative to a rather sad looking veggie burger!
I’m a big fan of blue cheese and think it goes best with
something sweet (see my stilton and walnut scones with pear jam http://bit.ly/14587Np). This dish matches the
sharp blue cheese with the savoury sweetness of butternut squash- set of by the
salty sweetness of walnut butter.
Making pasta is really simple, it’s the rolling out of it
that is ‘difficult’. With a pasta machine it is a really easy process of
passing the dough through the machine until it is paper thin, it can also be
done manually with a rolling pin (how I’ve done it this time) but it’s really
quite hard work and, as I did, you will usually end up with a slightly thicker
pasta.
Ingredients: (these
quantities should make about 32 ravioli- 8 per person)
The pasta-
2 cups plain flour
3 eggs
Salt
The filling-
Large butternut squash- about 2/3 the size of a 2 litre coke
bottle
200g blue cheese
Salt and pepper
1 egg for sealing the ravioli
The butter-
2 tablespoons salted butter
A handful of walnuts
Method:
First make your pasta, make a well from the flour on a flat
surface or in a large bowl. Crack you eggs into the middle of the well and
sprinkle over the salt. Using one hand, whisk the eggs gradually into the flour
walls until a dough has formed. Knead the dough for about ten minutes on a
floured surface until it is very elastic and very smooth to the touch. Cover
the dough with cling film and pop in the fridge to rest whilst you make the
filling.
Peel the butternut squash, cut in half then scoop out the
seeds and stringy flesh from the centre of the squash, then chop into chunks
about an inch square. Tumble the squash into a sauce pan and cover with boiling
water, place on a high heat until the water boils then turn down the heat and
simmer until the squash is tender. Drain the squash and leave to steam, for
most of the moisture to evaporate away then mash with plenty of salt and pepper
to a smooth puree.
Spread the puree out onto a large plate and set in the
fridge to cool, spreading it in on a plate will allow it to cool faster. Now
you want to roll out your pasta, if you have a machine pass the pasta dough
through the largest setting a couple of times to flatten it out but so it’s
still quite thick, fold the pasta in on its self, not in half but a third over
a third over a third. Pass the pasta back through the thickest setting then
repeat the folding technique, do this 5 or 6 times until the pasta is very,
very smooth and soft. If you don’t have a machine follow the same instructions
but using a rolling pin and manually flattening out the dough- it will take a
lot long and be a lot harder- I shall be buying my USA pasta machine shortly!
Once you’ve completed the fold and roll stage, divide the
pasta into four equal portions as its easier to work with in smaller portions.
Using either your machine, reducing the thickness setting gradually, or your
rolling machine, using your sheer determination and stamina, roll out the pasta
until it is paper thin.
To make the ravioli mentally divide the pasta sheet in the
half as you will have to fold one half on top of the other to make the parcels.
On what will become the bottom sheet of your ravioli dollop teaspoon sized
portions of butternut squash into the pasta sheet leaving an inch border
between each portion. Press a penny sized piece of blue cheese on top of the
squash and using a brush you’re your fingers paint some beaten egg around each
of the squash/cheese portions. Now fold the ‘top’ half of the pasta sheet over
the mounds of squash and cheese and using the outer edges of your hands, press
the air out of the each of the parcels and firm press the sheets of pasta
together. Cut the ravioli into separate pieces, either use a knife and cut into
square or a cookie cutter for circles, leaving a centimetre boarder of pasta
around the filling, use a fork to seal the edges and create a ridged patter
around the edges. You can get some special ravioli cutters that cut and seal
the parcels and ensure you get a uniform finish to your pasta, and even ravioli
tray mould where you lay the pasta sheet over the tray, fill the indents, lay
another sheet on top then press together- these have been added to my wish
list!
Place your finished ravioli on to a sheet of greaseproof
paper, you can freeze the ravioli but make sure you lay them out flat on a tray
then cover them until they are frozen. Then you can pop the frozen pasta into a
bag or box, by freezing them flat first they won’t stick together while
freezing.
To make the walnut butter, finely chop the walnuts and stir
into softened butter, this can be kept in the fridge until you need it.
Heat a large pan filled with salted water to a good, rolling
boil. Drop your ravioli into the boiling water a cook for 2/3 minutes until the
pasta are bobbing about on the surface of the water and are firm when you press
a fork into the edge of a parcel.
Serve up about 8 parcels per ‘main meal’ portion with a
scoop of walnut butter melted over the top.
A lovely little sweet treat for a summery breakfast.
Ingredients:
Pancakes-
2 eggs
½ cup ricotta
½ cup milk
1 ½cup SR flour
Pinch of salt
2 tablespoons honey
1 lemon’s zest
Syrup-
1 lemon’s juice
5 teaspoons sugar
Method:
Separate the yolks from the eggs and place the yolks in one
bowl and the whites another. Add the ricotta, milk, lemon zest, salt and honey
to the bowl with the yolks and whisk until smooth, sieve the flour and gently
whisk into the egg/ricotta mix.
In a separate bowl with a clean whisk (electric if you don’t
want your arm to fall off) whisk the egg whites until they resemble stiff
peaks. Dollop the egg whites into the ricotta mix a heaped tablespoon at a time
and very gently fold the mixtures together until they are well combined but
foamy and light.
To make the syrup, squeeze the juice for the lemon into a
small saucepan and add the sugar, heat until the mixture begins to bubble then
turn to a medium heat and leave to reduce. This is a light syrup, not the
consistency of golden syrup more like a runny honey, so stir it occasionally to
see how thick it has become.When it is
slightly thick but not darkened turn off the heat and pour into a jug or jar.
Heat a large frying pan on a medium heat and pop a little
bit of butter in the pan to melt but not colour, dollop in a blob of batter
into the pan and spreads it out a little with the back of a spoon. These
pancakes work best a smaller sized cakes rather than the large traditions crepe
style pancakes- make sure they are no larger than a CD.
Let the cake bake in the pan until you see bubbles rise on
the top of the batter, then flip and cook the other side for a minute or until
the cake shifts in the pan when you shake it.
I got 7 cakes from this mix so double it up to serve more
people- I would serve 3 cake per person. Serve up with a little scrape of
salted butter and a drizzle of lemon syrup.
Given the carb overload I posted yesterday I thought it
sensible to offer something that cuts out the carbs and replaces them with some
virtuous vegetables… and some cheese.
Ingredients (This will make enough for 2 very generous portions
or 2 sensible portions and left overs):
1 medium sized aubergine/eggplant about the size of a 1 pint
milk bottle
Salt and pepper
A splash of oil for frying
1 cup whole milk
ricotta cheese
½ cup black olive tapenade (or make your own by blending up
½ a cup of pitted black olives with a little dash of olive oil)
¾ cups tomato sauce (there is a recipe for all purpose
tomato sauce on my blog which can be found here http://bit.ly/11BKB7z)
A handful of grated parmesan cheese (or pecorino for vegetarians)
Method:
First slice off the stalky top of the aubergine then slice
into thin strips lengthways- you want the strips to be about ½ a centimetre
thick. The temptation is to peel the aubergine as the skin seems quite thick
but its tenderised during cooking and helps to hold the delicate flesh in shape
when baked. I got 10 good strips from my aubergine and 2 skinny little things
from the outer edges.
Splosh a little oil into a large frying pan and heat to a
medium heat, when the oil is hot place the strips in the oil and season the
side facing up- season the other side when you turn it. Don’t crowd the pan,
fry the aubergine in batches if you have to, when it is lightly golden and has
become quite soft, remove the slices form the pan and set aside to cool a
little.
Have your baking dish ready, I’m a big fan of oven to
tableware so choose something nice looking as it’s really a meal that can be
served from the dish, my dish was about 20cm square.
Smush your ricotta up a bit so that it’s easier to spread,
it sets a little in the carton but will resemble cream cheese if given a good
mix. Take one of your aubergine strips and lay it flat on a board, spread a
table heaped teaspoon of ricotta across the aubergine, on top spread a level
teaspoon of black olive tapenade over the ricotta. Starting at the narrower end
of the slice, roll the aubergine onto itself then place the roll with the open
edge facing down in your baking dish. Repeat this with all the slices and tuck
them up tightly in the baking dish in a nice orderly fashion- this makes
portioning easier. Like I say, I got 10 good slices from my aubergine, which
made 10 rolls, so you’ll see that 5 rolls makes a very generous portion per
person.
Once all your aubergine slices are rolled and tucked up in
your dish, pour over your tomato sauce making sure that all the rolls have at
least a thin coating of sauce over them. Generously sprinkle over your parmesan
then bake in the oven at about 180c for 45 mins until the top is golden brown
and the edges begin to bubble.
When serving up, gentle use a spatula to find the rolls and
try to portion up ‘whole ‘ rolls, it keeps the ricotta filling from oozing into
the tomato sauce too much which means the flavours compliment each other but
stay distinct.
This is essentially a cheat’s (or gluten free!) pasta dish
so serve up with a nice green salad and enjoy your virtuously carb free dinner!
This may well become one of my all-time favourite recipes. I know adding a butter-rich frying stage to the gnocchi is a
bit naughty but it’s only a teeny weeny bit of butter and the texture and
flavour you gain is worth it. Plus this is pasta made with potato- you’re
already well and truly planted in carb central so a bit of butter really won’t
hurt!
Ingredients:
The gnocchi-
1 medium sized potato- you want to end up with about 1 cup
of cooked mashed potato
1 ½ cups plain flour
1 egg plus 1 yolk
Salt and pepper
The pesto-
1 cup of unsalted roasted peanuts (shells removed)
1 cup of grated parmesan (or pecorino for vegetarians)
A handful of fresh basil- this will depend on how large you
hand is so about 20g
½ cup of good olive oil
Pepper
Method:
Pesto is an incredibly versatile ingredient in itself and
has saved many a lazy meal with it’s simple ease- adding it to pasta dishes,
using it to season soups and sauces or as a marinade etc … Shop bought is fine
but it’s so easy to make, and with a little substitution, not as expensive as
you may think. The most expensive part of pesto is normally the traditional
pine nuts, my version uses peanuts which are half the price- sometimes less. I
think the flavour is delicious and with it being so simple to make it is
definitely one of my staples.
To make the pesto is a very simple process of processing-
whack it all in a bowl and whizz it up. Don’t blend it into a fine paste; you want
to keep it chunky, with texture. The best way to do this is to pulse the
blender so you can keep control of the consistency.
A little trick I’ve learnt when using my stick blender and
invariably getting covered in whatever is being blended is to use a homemade
‘splash guard’. I have, in the past, used tea towels and pan lids to try and
stop the inevitable blender movement but anything that offers a decent degree
to food protection means you can’t see what you are doing- disaster for moments
of texture importance. Use a piece of acetate, the type from an overhead
projectorand cut a hole in the middle,
then make a single cut from the out edge to the central hole. Because of the
rigidity of the plastic this cut will allow you to slip the stick blender into
the central hole but still keep the shape of the sheet. Use the blender as per
normal but with the ‘splash guard’ pushed down to meet the rim of the bowl- et
voila! You can see what you’re blending without getting covered in it!
Right back to the pesto, this recipe makes about a mugful of
pesto so pour it in an airtight container and keep it in the fridge. I would
keep it in the fridge for about a week or two as the oil will preserve the
basil and the cheese.
To make your gnocchi, first you will need to make your mash.
I have taken the skin off in my recipe but you can leave the skin on but you
must really mash up the skins to they are well mixed in- blend it even. Leave
your potato uncovered in the fridge for 10 mins so it’s really cooled and a lot
of the moisture has evaporated out of it.Add your mash to a bowl with the flour, salt and pepper and mix with
your fingertips as you would pastry. When it’s well combined make a well in the
center of the mix and add your eggs (pre-beaten), using your hand work the
flour/potato mix into the egg until it forms a smooth dough. Plop this out on
the floured surface and knead for a further 5 minutes. When it’s nice and
smooth, place it back in the mixing bowl and cover with cling film or a plate
before leaving to rest in the fridge for 10 mins.
Gnocchi is much like pasta in terms of how to shape it, you
can do what you want but they is a tradition way which works really well with
the frying stage (Note to any Italians out there- I’m sorry if my version of
the traditional way falls short but it tastes really good and tried really
hard).
There is a traditional tool to make gnocchi which is a
wooden board with ridges in it that the gnocchi is rolled on to give it indents
which help to hold on to sauce. I do not have one of these boards so I am using
a fork. Divide the dough into four equal portions and work with one at a time,
roll the dough into a long sausage that’s as thick as a tube of polos (a roll
of mentos for any American readers!) cut into 12 equal sized pieces- now here
come the ‘traditional’ bit. Using a fork, roll the gnocchi piece with the tines
of the fork so they create indent as the gnocchi roll. It is fiddly and
difficult but the intention is to create bits where sauce can get stick so
don’t worry too much- just squidge them back into a nugget shape if they get
too flattened.
This recipe make enough for 4 people if served with salad
and bread, 3 people if served solo or 2 very greedy hungry people. The gnocchi
can be frozen but they need to be cooked first, bring a large pan of salted
water to the boil and pop in the gnocchi, do it in a couple of batches so as
not to over crowd the pan. When they rise to the top they are cooked, this only
take 2 to 3 minutes, when they bob to the surface scoop them out the set them
aside. If you are going to freeze them then let them steam dry for a while
before popping them in the freezer- so they won’t stick together too much.
If you are serving them up straight away, allow them to
steam off for a minute or two before frying them in a little butter until they
are lightly brown on the ridges. Turn the heat off of the pan before spooning
over the pesto- I allow about a tablespoon per portion, then serve.
As most will attest, the British love a good curry, it’s
even been voted at Britain’s favourite dish! I am like many of my fellow Brits
in loving Indian food but it does not top the food lover’s charts here in the
States quite so much as back home. There are a couple of Indian restaurants in
here in Providence- one of which I have tried so far, and whilst it’s undeniably
delicious it didn’t quite satisfy my need for some (albeit British style)
Indian food.
My favourite curry is the creamy and rich chicken korma
(recipe in the archives!) but it’s just too hot here for my acclimatised taste
buds for that sweet, creamy sauce (yes I get the irony and am aware that India
is also a bit warm now and again). So here is my nod to the Indian influences I
love in a climate appropriate and fussy-Holly-satisfying style….
Ingredients:
The paneer-
Paneer cheese- I allowed a chunk the size of standard size
matchbox per person
3 tablespoons of yoghurt per portion of paneer
½ teaspoon of mint per portion
1 garlic clove per portion
1 teaspoon or garam masala
½ teaspoon of crushed coriander seeds
½ teaspoon of crush cumin seeds
The juice of half a lime per portion
Salt and pepper
Indian style chop
salad (this will serve 4/6 people but can be kept covered n the fridge for a
few days undressed as left overs)-
1 romaine lettuce head
3 tomatoes
1 small red onion
A fist of fresh coriander leaf (cilantro)
For the dressing-
1 tablespoon of mango chutney
The juice of half a lime
2 tablespoons of olive oil
Salt and pepper
The roti (this will
make enough for 4 roti)-
1 cup SR flour
2 tablespoons of olive oil
Cold water
Salt
The stuffing-
4 table spoons of ground almonds
4 tablespoons of butter
Method-
For the best results you are going to want to get you paneer
in the marinade and leave it in the fridge 24 hours before you want to cook and
serve it. Finely mince the garlic cloves them mix all of the marinade
ingredients together, cut your paneer into portions but don’t cube it any
smaller than the ‘whole’ portion size. This way you can slice the paneer after
it has been cooked and serve it with a beautiful spiced crust but a virgin
white inside. Immerse the paneer in the yoghurt marinade ensuring it is
completely covered then pop in the fridge for 24 hours.
To make the chop salad, simple finely chop all the
ingredients together- removing the water seeds from the inside of the tomatoes
first. The act of chopping is your method for mixing the salad also, it’s
almost like a dry salsa. To prevent yourself from loving any of your
ingredients off the side of you surface, make sure you use a large board and
knife, using the knife to scoop and mix the ingredients back to the center when
they start to escape.
Make the dressing by whisking the mango chutney, lime juice
and olive oil together then salt and peppering to taste. I wouldn’t dress the
salad before serving it or dress any salad that you intend on keeping in the
fridge as it degrades the freshness of the salad when stored.
To make the roti make a well with you flour on a board or in
a large bowl and shake over your salt, add you oil and work through the flour
to create bread crumbs that are almost like wet sand. Add cold water little by
little until the flour comes together in a dough, knead for 10 mins. Pop you
dough in the fridge covered in cling film and leave for about an hour.
The roti stuffing a simple ground almonds mixed with
softened butter, you can make this whenever you want but if you make it in
advance be sure to remove it from the fridge 10 minutes before making the roti
as it will need to be spreadable.
To stuff the roti, divide your dough into eight equal sized
pieces, deal with you roti one at a time to stop the dough drying out, return
the unused dough to a covered bowl whilst you make each roti. Roll out two
pieces of the dough into two thin circles, the thickness of a greeting card-
the easiest way to do this is to sandwich the dough between greaseproof paper
to get it very thin without sticking to the surface, add a little flour if you
have trouble. Spread a tablespoon of the almond mixture onto the one of the
dough circles keeping a board of about half an inch around the sides. Using a
little cold water as glue on the edges, place to second circle of dough over
the almond covered circle and press together to seal. I tend to cook these as I
go along, dry fry the roti in a large flat pan on a medium/high heat for about
2/3 minutes either side. You want the roti to be, generally, a pale creamy
colour but with spots of darker brown across the surface. Repeat this until all
your roti are cooked, you can pre-make the roti then reheat them in a pan
before serving or piled together wrapped in foil in a low oven.
To cook the paneer, heat a large frying pan to a medium high
heat, do not put any oil or butter in the pan. Remove the paneer from the
marinate and scrape away any excess yoghurt from the surface, a light coating
is good but you don’t want any large chunks of garlic or big splodges of
yoghurt. Dry fry the paneer on each of its side for about 10 minutes in total,
the cheese is of a consistency similar to halloumi so it will not melt. When
each of the sides has been fried and acquired a darkened colour removed from the
pan and slice before serving to reveal the lovely clean, white inside.
I serve the paneer with the above accompaniments and a
drizzle of minted yoghurt… a nice cold glass of wine also goes down a treat!
There are a few key flavours that are completely American in
my opinion. On the sweet side you have coffee and cinnamon (I will definitely
be revisiting these soon!) and on the savour BBQ… or at least I thought so
before we got here. Buffalo sauce isn’t something I’ve heard too much about in
the UK, I knew of its existence but never really though if it as a ‘big deal’
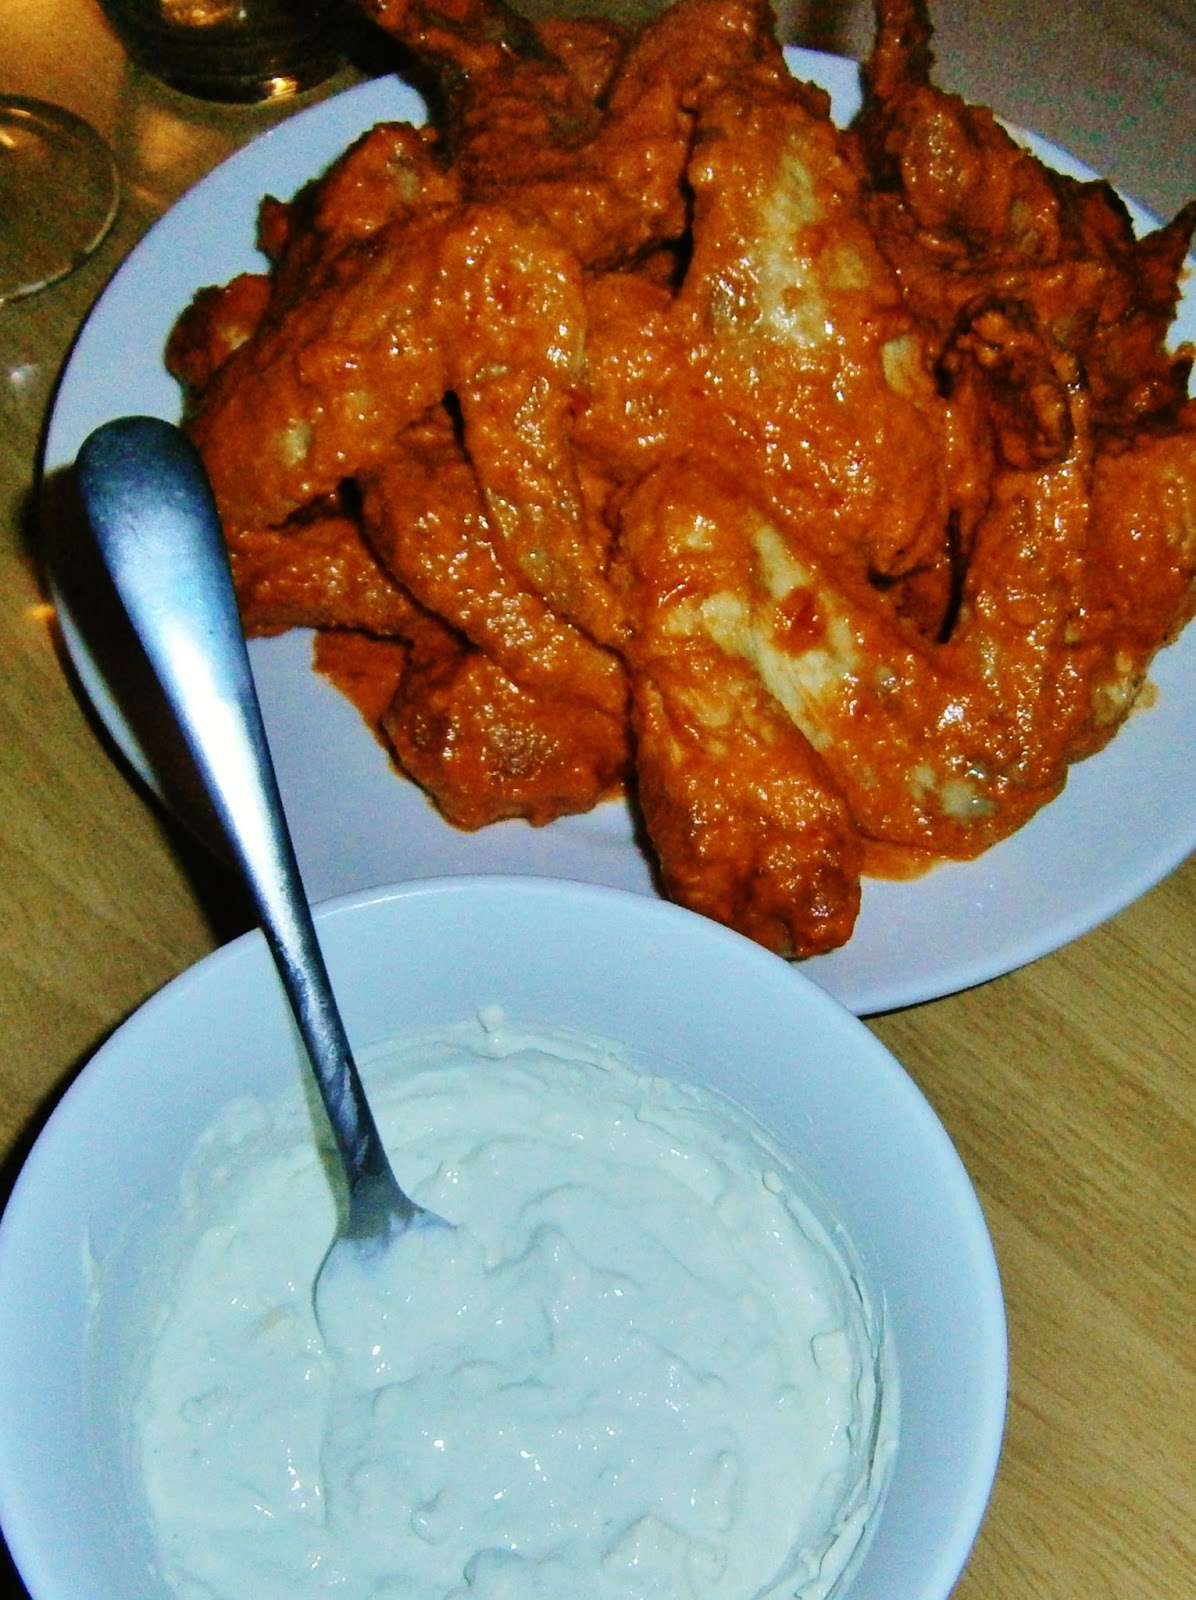
American food wise- how wrong I was. Buffalo chicken wings with the ever
present blue cheese dip are a staple on the appetiser or bar menu here and like
most well loved things, have a few different variations. Essentially you toss
your crispy fried chicken in the hot, sweet and spicy rich orangey red sauce
and make a huge mess of yourself getting stuck in with your hands. The blue
cheese dip is a brilliant accompaniment as it cools down the spice from the
chicken sauce- though it does also add to the mess!
Like I say, we’ve come across a very different variations
ranging from the home made to themass
produced and from the sweet to the tear inducing-ly spicy. Here’s my recipe for
chicken wings in Buffalo sauce.
Ingredients:
The chicken-
16 wings-the wings I used were the full wing joint rather
than the little ones so you could use more, smaller wings with this amount of
sauce. Also try it with chicken drumsticks and thighs
Flour
Salt and pepper
Enough oil for frying- not full deep fat frying but so the
chicken is submerged in a good inch of oil, the amount will depend on your pan
The sauce-
1 large red (bell) pepper
3 large plum tomatoes
4 cloves of garlic
Fresh chilli- the potency and number of chillies depends
entirely on your preference for heat in the finished dish
2 anchovy fillets
½ cup salted butter
Salt and Pepper
A splash of beer
Tobasco- should you wish
The blue cheese dip-
½ of your favourite blue cheese- I used gorgonzola
1 cup sour cream- These amount can be increased in the same
ratio to make more!
Method:
Roughly chop the garlic, pepper and chilli before tumbling
into a roasting pan and drizzling with a little oil. Quarter the tomatoes then
cut out the seeds before roughly chopping the flesh and adding it to the
roasting dish. Pop this in a preheated oven at 180c and leave for a good 30
mins before checking on it. When you check on it give everything a turn and
splash in a glug of beer- not enough to require me giving an exact measurement
but enough so that it visible in the bottom of the roasting dish. Return the
dish to the oven for a further 20 mins.
You want the vegetables to be soft and squashy but have
gained a little bit of colour at the edges and the beer to have cooked away.
When you reach this stage remove the pan from the oven, clear a small space in
the dish and add your anchovy fillets. Using a fork, mash them into the pan
juices, the heat and the cooking juice will disintegrate them for you to stir
into the vegetables.
Add the butter and stir until it is melted completely. At
this stage I transfer all the vegetables into a bowl that I can use a stick
blender in without getting covered in sauce. Using the stick blender- or
regular blender (I find regular blenders such a bore to clean I am a big fan of
the handheld stick blender) whizz the mixture until you have a smooth sauce.
Buffalo sauce is not a thick, sticky sauce like a BBQ sauce, it’s more the
consistence of thick soup but very smooth and a gorgeous deep red colour. At
this point season the sauce with salt and pepper and add tobacco if you want a
sharper spice. I like mellow heat of the roasted chilli but if you want
something a bit punchier dash away the tobacco until your heart is content!
This is your buffalo sauce- you can do a further stage but
we’ll come back to that*. The sauce can be stored in the fridge or frozen or
used straight away. I usually prepare the chicken whilst the sauce ingredients
roast the throw it all together at the end.
To prepare the chicken add a good big pinch of salt and
pepper to a bowl of flour and mix well. Have your pan of oil on the hob ready
to go- I have it on a high medium heat and tell its ready when a drip a little
bit of bread into the oil and it starts to fizz but not go popping crazy.
Douse your chicken generously in the flour until the pieces
are well coasted then fry in the oil. You may need to do this in batches as you
don’t want to over crowd your pan. Fry until the chicken is golden brown (about
10 mins but this will depend on the size of your wings or chicken portions, the
size of your pan etc…) always check the chicken is thoroughly cooked by tearing
some of the chicken away at the fattest part of the wing. To be extra save I
usually fry until I get the colour I want then ‘hold’ them in the oven on a low
heat so they will just finish cooking but not dry out.
Making the blue cheese dip is a simple case of mashing your
cheese into the sour cream then giving it a good whipping with the form to make
sure its evenly distributed.
When your chicken is done, toss it in the warm buffalo
sauce, serve up with you blue cheese dip on the side and plenty of napkins!
*Any chicken that isn’t finished off, or if you fancy
something not quite so entirely messy you can toss your chicken (cooked or not)
in the sauce then leave to marinate for 24 hours. Bake the chicken in a 180c oven
for about 30 mins for raw chicken and 15 mins for cooked chicken then serve up
with the above mentions accompaniments. This version of the dish isn’t quite so
messy and gives a further richness to the coated chicken from the double
cooking.
Rich nutty sponge with a sweet cherry jam cream filling
Aside from the pressing need to use up the cherry glut I’m
also hankering for a little bit of home, what better way to express this than
in cake? This is essentially a flavoured Victoria sponge, then again any cake
with two sponge layers and some kind of filling is a take on a Victoria sponge
so I don’t feel too bad for bastardising the original.
I wanted to take a bit of influence from the Bakewell tart
given that almonds marry so well with cherries, but something a bit lighter.
Cake ingredients*:
3 eggs
1 ½ cups of caster/fine sugar
2 ½ cups of self-raising flour
1 cup of ground almonds
1 ½ cup of margarine/baking fat
Filling ingredients:
1 cup of cherries- cut in half with the stones removed
1 ½ cups of jam sugar
½-1 cup of apple juice
1 cup of whipping cream
*Though I assured friends and family I would not assimilate
too quickly and pick up a transatlantic twang I have however embraced the
American measuring unit of cups… this is because I do not yet own any scales.
Method:
This cake is, as previously stated, a take on a Victoria
sponge and therefor the method of making it is much the same as any regular
sponge cake. Begin by creaming together the margarine and caster sugar until
they are light and almost foamy to touch. In a mug or separate small bowl, beat
your eggs together until they are well combined. Sift in a third of your flour
to the main mixing bowl and sprinkle over a third of the almonds, to this
splosh in a matching third of your beaten egg mixture. Gently fold the
ingredients together until they are well combined then repeat until all of the
flour, egg and almond mixture is added.
I baked my cake in a square tin about 20 cm square and 5 cm
deep as I want to cut then up into individual squares or finger shaped cakes.
You can bake the cake as a traditional Victoria in a round tin and serve it up
whole though quite happily. Grease and line the tin with baking parchment then
place in a preheated oven at 180c for about 25/30 mins, my cake baking timings
are so based on look and feel that the length of time is really just a guide.
When the cake is lightly golden on top and springy to a light touch in the
middle your cake is ready. It can be further checked for readiness by inserting
a skewer to the thickest part to check if the batter is fully cooked, though be
wary with this particular cake as the addition of almonds make the finished
cake very moist so don’t confuse the moisture with it being under baked.
Leave the cake to cool and make your filling.
Tumble your cherry halves into a small saucepan along with your
sugar. Pour over the apple juice until the cherries are almost covered but you
can see a few domes and edges sticking up here and there. Bring the mixture to
vigorous boil- being VERY careful as hot syrup is not something you want on
your bare skin! When the mixture has boiled for 5 minutes turn it down to a
gentle simmer, you will see that the surface of the liquid has started to
froth, the colour of which can be brown. Use a long handled spoon (to protect
your hands) to skim off this froth and discard it, the froth will be the
impurities in the juice and any little bits of dirt or dried skin on the
cherries. It won’t harm or hurt you to leave the froth in but removing it make
for a cleaner flavour and a nicer colour to the finished jam. Simmer the jam
until the liquid has reduced so that it just covers the bottom of the pan and
the cherries are very proud in the pan, the jam should be a rich, dark red and
very shiny. To check that it is ready, blob a small teaspoon amount onto a cold
plate and let it cool for a few minutes. Then (hover your finger above it first
to check its cooled) run your finger through the blob, if your finger makes a
clean path through the jam which stays clear- the jam doesn’t run to fill the
gap your finger has made, then it is ready!
Leave the jam to cool- being terribly impatient I often pour
it into a clean bowl and pop it in the fridge, whilst it cools you can whip up
the cream, don’t add any sugar to the cream before whipping.
Cake and cream are not often thought of as any kind of good
for the waist line, however in this instance my cake is particularly good for
the upper arms. I discovered this as a tried to whip cream without a whisk,
using two forks held back-to-back in one hand (which astonishingly did work-
eventually) and a huge amount of ‘exercise-montage’ style grimacing. You,
however, can make use of a whisk or even an electric beater should you have
one- though I make no promises about the effectiveness of cake on upper arms
claim should you deviate from my double fork method.
Once you have softly whipped cream and cooled jam, VERY
gentle fold them together to create a nice rippled effect. The jam will sweeten
the cream and you’ll end up with a gorgeous mess of cool cream with rivers of
sweet jam running though it with the occasional chewy cherry hiding within.
How you fill the cake will depend on the size and shape you
have chosen, if you are doing a simple large Victoria style sponge then split
your cake lengthways so you end up with two thin cakes of the same size to
create a sandwich. Then dollop in your cream, being careful not to over mix the
rippled effect, pop your top cake on an you are done. If, like me, you decide
on small dainty cakes then I would suggest cutting your cakes into the sizes
you desire then splitting and filling them. A little more time consuming but it
does mean you can adjust where you split the cake depending on where in the pan
the section came from. I find the middle portions are always a bit higher and
thus if the cake is split as a whole the middle portions end up with a skinny
bottom and a fat top. It’s also a good idea to fill you cake individually
rather than fill the large cake before dividing into smaller ones. The delicate
cream doesn’t hold up well to the pressure of a knife and I fear you will end
up with an empty cake and a lot of cream on your work surface.
Sprinkle with a little icing sugar if you so desire and
serve up with a good old English cuppa.


.JPG)