press

Craftland Blog: Home Visits- Holly Vine

July 30, 2014


One of the independent stores in Downcity Providence that I always find myself in is Craftland. Filled with handmade, unique and artisan pieces is the perfect place to pick up a gift or find a special something to bring a little colour to your home.

They also featured in my 100th Post Giveaway!

Read about my favourite bits and bobs from Craftland here


baking

Cheese Straws

July 28, 2014


Cheese straws puff pastry snack

Cheese straws puff pastry snack

This is a really great little way to use up Rough Puff Pastry offcuts, after all it would be sacrilegious to throw away that lovely buttery stuff!

Simple squash together your offcuts and roll out to just under 1/4 inch / 1/2 cm. Grate over some lovely strong cheddar or gruyere cheese and press gently into the pastry.

Use a pizza cutter or sharp un-serrated knife to slice the pastry into strips about a 1 inch / 2 1/2 cm wide, then twist them so that they do a full twist about 3 or 4 times. Transfer to a greased baking tray and pop in the oven for about 15 mins until golden and the cheese is melted and toasty brown.

These are a great thrifty little snack to go with drinks.


Cheese straws puff pastry snack


eating

Interview: Seven Stars Bakery

July 25, 2014

Seven Stars Bakery Providence Rhode Island


I was recently asked by Taste Trekkers to write about my favourite bakeries in Providence. I found out so much chatting to the pastry makers on my list that I wanted to share these extra goodies with you on my blog!

entree

Naked Wellingtons

July 23, 2014

beef wellington pastry free individual

beef wellington pastry free individual

beef wellington pastry free individual

beef wellington pastry free individual


Sometimes you find yourself wanting a dish that's a bit labor intensive or heavy for a Summer evening, but you just can't shake the craving. This happening to me recently and I couldn't get the idea of a Beef Wellington out of my mind.

entree

Summer Herb Spatchcock Chicken

July 21, 2014

Summer herb spatchcock chicken recipe


Summer herb spatchcock chicken recipe

Summer herb spatchcock chicken recipe

Summer herb spatchcock chicken recipe

Summer herb spatchcock chicken recipe

Summer herb spatchcock chicken recipe

There's nothing quite like the flavour of a whole roasted chicken. Though often thought of as a dish deserving of more than a spot on the weekday dinner roster, it is an incredibly easy one to prepare and is infinitely better value than buying prepared chicken breasts.

eating

Interview: North Bakery

July 18, 2014

Interview with North Bakery Providence Rhode Island

Interview with North Bakery Providence Rhode Island
I was recently asked by Taste Trekkers to write about my favourite bakeries in Providence. I found out so much chatting to the pastry makers on my list that I wanted to share these extra goodies with you on my blog!

New to the Providence bakery scene, North Bakery on Battey Street is the little sister to it's eponymous bijou brother just around the corner on Luongo Square.

I had the opportunity to grab a few moments with the masters behind the muffins- or rather, Dan Dan Handpies:


1) What prompted you to open North Bakery in the wake of the success of North

The bakery was really a product of the space. We found the space on craiglist for a really inexpensive rent, but we knew it had some limitations. It needed a ton of construction, which we had never done before, and had no gas. We had wanted to bring our friend Kelly Dull on to our team, and wanted to do something that was open during the day, so we figured a bakery would be a great new addition to our restaurant.

2) What was it about the West Side location that made you choose it for the home of North & North Bakery?

My team of managers (there are five of us) all graduated from the same class of JWU, we all lived in the West Side during school. That started almost a decade ago, and the neighborhood is very near and dear to our hearts - we all still live here. The rents are inexpensive enough that there are still opportunities, and yet the the neighborhood feel super dynamic and open to change

3) Where does your inspiration for flavours come from?

Much as we consider North a non-traditional American restaurant, we consider North Bakery a non-traditional American bakery. We like to either take familiar flavor profiles and turn them in an unexpected but recognizable way, or more often arrive at a familiar flavor in a way a person did not expect. We have no real hard and fast rules other than that it needs to be delicious. 

4) What is your favourite menu item?

A hot cup of counter culture coffee and a nut bar is probably my favorite breakfast in providence. But I'm also a sucker for Kelly's chocolate chip cookies (which are perfect).

5) What is your favourite Providence bakery, aside from yourselves of course!

We are very good friends with the guys at Foremost Baking Company, they started up when we opened the restaurant and were one of their first clients. The restaurant still uses some of their bread today. 

My favourite nibble from the bakery on my visit was a toss up between the deliciously sweet lemon tart topped with toasted meringue crumbles and the soft, more-ish coconut macaroons!


North Bakery
70 Battey Street
Providence
02903
(401) 421 4062


Interview with North Bakery Providence Rhode Island


baking

Breakfast Pastries

July 16, 2014

Breakfast pastry bacon egg cheese rough puff

Breakfast pastry bacon egg cheese rough puff

Breakfast pastry bacon egg cheese rough puff

There's nothing quite like a buttery, flakey pastry for breakfast- and when it's filled with bacon, egg and cheese, even better!

Use my rough puff pastry recipe for the base of these breakfast treats.


Ingredients: To make 8 pastries

Rough puff pastry or puff pastry, pre-made or home made- use half of this recipe
8 eggs plus 1 for egg washing- I would suggest selecting small or medium eggs
16 slices of bacon
1 cup grated cheddar cheese

Method:

Roll out your pastry to about a 1/4 inch / just under 1cm thick and cut into squares that are 3 1/5 inches/ 9cm along each edge.

Leaving a border of just under and inch/ 2 1/5 cm cut an 'L' into the corner, following the line of the pastry square. Cut another 'L' into the opposite side of the square but make sure the two 'L's' do not meet. You should have a large pastry square with a smaller square cut into it, but whose edges do not meet all the way in two opposite corners (See picture 2).

Pull up one of the corners of your square with an 'L' corner cut into it and fold it over to it's opposite side, sticking it with a little beaten egg to the corner of the smaller square you create with the 'L' cuts.

Repeat with the opposite side, you should have a diamond shape with two opposite corners that are folded over. This creates a little wall around the interior square, which (when the rough puff puffs) will hold you filling in place.

Transfer your pastry diamonds to a well greased non-stick baking sheet before filling or you will find yourself in a terrible mess.

Drape your bacon slices around the edge of your pastry diamonds, use it as extra wall ballast to contain the egg and cheese! Crack an egg into the middle void and top with a generous pinch of cheese.

Egg wash the pastry edges you can see and pop into the oven at about 360F for 25-30 minutes. You want the white of your eggs to be completely opaque and the pastry to be golden and risen.

As the bacon and pastry cook, and invariable melt and move a bit, your egg may well make an attempt at freedom (use small eggs to try and avoid this!). Don't worry too much about it- this is home cooking, it will still taste wonderful even if it is a little scary looking!

These can be cooked ahead of time and reheated in the microwave or a low oven for an easy breakfast. Served best with a generous blob of ketchup and a nice cup of tea.

Breakfast pastry bacon egg cheese rough puff


baking

Rough Puff

July 14, 2014


Making true puff pastry can be pretty laborious. The stages of folding, rolling and chilling over and over make it a labour of love and often mean popping to the shops for some pre-made puff is the order of the day.

For when you fancy making from scratch and don't have time or inclination to make the proper puffy thing (if you do want to make it my recipe is here) here is the rough puff alternative.

Ingredients:

2 cups all purpose/plain flour
1 cup butter
3/4 cup cold water
Salt

Method:

Break the butter into chunks that are no smaller that about 1/2 inch cubes and throw in with the salt seasoned flour.

Pour in the cold water little by little, stirring into the flour and butter until it comes together as a lumpy dough. I don't usually refer to my pictures as instructional but the second picture above is the sort of thing you are aiming for.

Tumble your dough our onto a floured surface. You may have some loose flour, crumble and bits of butter that are not part of the dough mass but that's fine, they will come together. Scoop everything together and knead as little as possible until you have one big lump. you should be able to see chunks of butter here and there which is exactly what you want!

Roll out the dough to about 1/2 inch thick, aiming for a rough rectangle. With the rectangle laying widthways in front of you, take the right edge and fold it in, to 1/3 of the way into the pastry's left edge. Fold the left edge over to meet the new right side edge. You should have a new smaller rectangle/square that has three layers. Think of it as folding a fancy letter to fit in a envelope.

Roll out your new three layered rectangle to about 1/2 thick and repeat the process. Do this 3 or 4 more times, if any chunks of butter 'fall out' of the pastry just blob it back onto the dough and crack on, this is called 'rough puff' for a reason!

Chill the pasty mid folding if its very warm in your kitchen or you notice the butter melting and it becomes greasy. Rough puff is super quick to make so it shouldn't have time to melt, although my kitchen it dealing with temperatures nearing 90F so maybe a mini mid fold chill is advisable.

When you've competed your folds and rolls, chill the finished dough, wrapped in cling film or greaseproof/waxed paper for about half an hour before rolling out and using for many and various wonderful pastry projects!


drinks

Summer Drinks at The Providence Flea: Elderflower & Honey Lemonade and Cucumber and Mint Water

July 13, 2014


Fancy up the old favourite of traditional home made lemonade or make your ice water extra refreshing with these simple Summer drink recipes.

If you tried these at The Providence Flea, thanks for stopping by!

---------------------------------

Elderflower & Honey Lemonade

Ingredients: To make half a gallon/just under two litres

1 1/2 tablespoons honey
1 cup/ 240ml fresh lemon juice (get squeezing! That's about 5-6 large lemons)
1/2 cup/ 120ml elderflower cordial/syrup- I use this in the UK and this in the US
6 1/2 cups/ 1 1/2 litres filtered water

Method:

Before you squeeze your lemons, use a vegetable peeler to shave off the rinds and add them to the serving jug or storage bottle.

Mix together the squeezed lemon juice with all off the other ingredients and mix well.

Serve over ice.

---------------------------------

Cucumber & Mint Water

Ingredients: To make half a gallon/ just under two litres

Half an (English) cucumber
Large bunch fresh mint
8 cups/ just under two litres filtered water

Method:

Finely slice the cucumber and add to the serving jug, add the fresh mint and top up with plenty of ice and water.

If you want to do some of the prep in advance, you can slice your cucumbers and store them in a small plastic dish, topped up with water (so the cucumber is completely covered) then freeze. Make a giant cucumber ice cube if you will! Do this no more than 2 days ahead of when you want to make up the drink as freezing cucumbers make them go a bit mushy.

When you want to make up the drink simple pop you ice cube-cumber into the bottom of your jug or dispenser, throw in your fresh mint and top up with water and additional ice.


recipes

Duke Potatoes

July 11, 2014


I can be fancy if the occasion calls for it, but normally I like things simple, honest and tasting incredible.

Traditionally Duchess Potatoes are a cream, butter and egg yolk enriched mashed potato that is piped into perfect swirls then baked until crisp on the outside and fluffy within.

These Duke potatoes have all the rich indulgence of the dainty Duchess but without quite the finesse of their female counterpart.


Ingredients: Makes 4/6 portions

2 large potatoes
1 stick/ 1/2 cup butter
4 tablespoons of double/heavy cream
2 egg yolks
Salt and pepper

Method:

Peel and chop the potatoes into roughly 1 inch square cubes. Tumble into cold, salted water then bring to the boil. Turn down the heat under the pan and leave the potatoes to simmer until tender, about 8- 10 minutes.

Drain the potatoes and leave in the colander to steam dry. By allowing them to steam dry you will reduce the amount of water in the potato, this will help the mash bake and crisp in the oven.

When the potatoes have dried and cooled a bit, add in the butter, yolks (you want the potatoes cooled so that they don't cook the yolk) and cream and mix with a spoon or masher to distribute all the ingredients. When the mash is mostly mixed, use an electric whisk or stick blender to puree the potato until it is very smooth and thick. Season to taste with salt and pepper.

Spoon the potato onto a well greased baking tray into 4 giant, 6 large or any number of smaller portions, then pop the tray into the fridge to allow them to set prior to baking.

By letting them set in the fridge it will help them keep their mound shape in the oven rather than melting into a flat potato pancake. By the time the butter in the potato melts enough to make the mash start to spread, the yolk will have set within the potato and a crust developed to hold its shape.

Bake at about 380F for 25-30 minutes (depending on their size, less time if they are mini Dukes) until they are golden brown with a crunchy crust and can be lifted from the baking sheet.

Serve as a side to Naked Beef Wellingtons (coming soon) or anything you would usually eat with mashed or roasted potatoes but fancy something a little bit richer.


eating

Taste Trekkers: My Top 5 Bakeries in Providence

July 10, 2014


I was recently asked by Taste Trekkers to write about my Top 5 Bakeries in Providence. I baulked a little at the challenge, however as a frequenter of the many baked good meccas of Providence I felt I could do justice to 'MY' Top 5 Bakery run down.


"Choosing the top five of any food category in Providence is going to delight and disappoint, cause contention and elation and be ever changing as exciting new and traditional established vendors vie for the hearts of Providence food lovers.
The bakery selection in Providence is incredible, with the vibrant influences of Downcity, progressive West Side and classic East Side culinary communities continuing to offer delights of the pastry variety, here is one version of Providence’s Top 5 Bakeries...."

My top picks include:

Foremost Baking Company
Ellie's Bakery
North Bakery
Olga's Cup and Saucer
Seven Stars Bakery

Read the full article here

hints

Drying Herbs

July 09, 2014


Cooking with fresh herbs is awesome, they are so fragrant and sweet and add a completely new fragrant layer to a dish.

If you can grow your own you will save so much time and money, but until you cultivate you herb box or find yourself a spot to propagate you may find yourself buying bunches of herbs from the market as I currently am.

This means that I'm often left with some left over herbs that will, despite my best efforts, go bad and be wasted. To keep fresh herbs fresh for a day or so they should be treated like fresh flowers and kept in a vase or jar in a cool place with fresh water submerging their stalks. Beyond a day or two like this though they start to get a bit sad and soggy.

Often I infuse spirits with left over herbs to make interesting cocktails, like my Mint Vodka.

Dried herbs are a very different beast to fresh, affording bolder richer flavours and often associated with heavier wintery dishes. I have found though, much like making anything yourself, home drying can result in a lighter version of the store bought dried variety of many herbs.

Simple lay your herbs out on a large baking tray, press them with absorbent paper towel to remove excess moisture then pop into the oven at about 250f/120c. After about half an hour, turn out the heat and allow the oven to cool with the herbs in it.

I usually do this post making dinner. I'll remove what ever i'm cooking from the oven and leave the door ajar to cool it down to about 250f whilst we eat then I pop the herbs in, potter about and tidy up then turn off the oven and leave the herbs until morning.

When you return to them they should be still a vibrant green but like butterfly wing, crisp and delicate.

Scrunch them from the stalks, discarding any thicker stalks that have become very sharp and store in an airtight jar.

As long as they are kept dry they should keep for some time, though their flavour will be less than it's best after a couple of weeks.


drinks

Ginger and lime gin and tonic

July 07, 2014


Gin and tonic is the archetypal Summer cocktail. Simple, refreshing and not overly sweet, it's made for sipping in the Summer sun.

A good bartender friend told me that it's a common misconception that G&T's should be served with lemon and that they should be garnished with a slice of lime instead. Being a lime fiend this is fine by me, but having indulged in some truly spectacular cocktails recently I fancied mixing it up with another spicy, citrus flavour: Ginger.

I've made flavored vodka before with fresh mint leaves, leaving them to infuse overnight. It's a great way to flavour liquors but not entirely immediate (and sometimes flavoured liquor is an immediate kind of thing). By using herbal teabags you can create some interesting infused spirits really quickly, deciding on the strength of flavour by leaving the bag in for more minutes as opposed to the required hours using fresh herbs etc.


Ingredients:

Gin ( I used about 2 cups)
2 limes plus a few slices to garnish
1 ginger herbal teabag
Tonic water


Method:

Cut the limes into eighths and squeeze the juice into a jar, or whatever receptacle you are planning on using to steep the gin, toss the peels in as well. Pop the tea bag in with the limes.

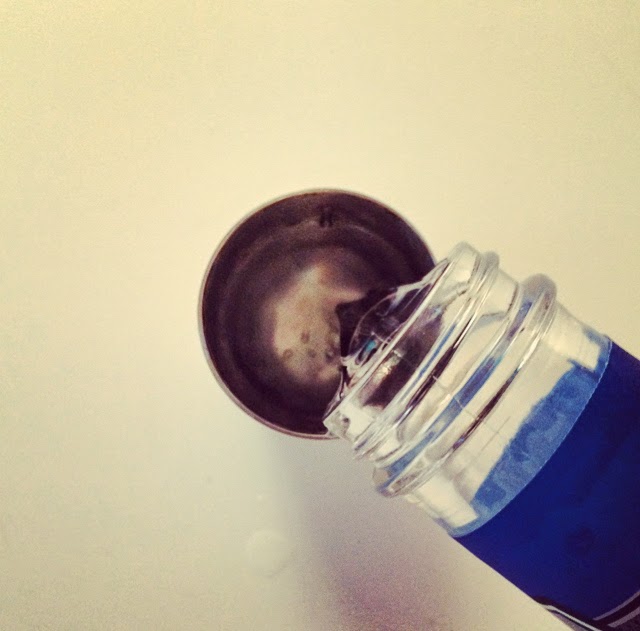
Warm the gin very gentle on a low heat in a saucepan, it does not want to be hot or it will start to evaporate and you'll lose the potency of the alcohol (bad). Just warm it to blood temperature, so that when you stick you finger in it you can't tell if it's hot or cold.

Pour the gin over the tea bag and lime, stir and leave to steep for a couple of minutes. The longer you leave the flavouring items in the gin, the stronger the flavour will be, so it's entirely your preference on how strong or light you want the infusion to be.

When steeped, strain out the flavourings and pop in the fridge to cool.

Mix with tonic and more fresh lime to serve, you can also rub a lime wedge around the rim of the glass for a really zingy sip.