entree

Turkey feta burgers

June 30, 2014


After returning from the lovely warm weather of San Diego, I was feeling like eating light and fresh. That's not to say that my appetite had diminished at all, as much as I love a summer salad, you can't beat the satisfying bite of a good juicy burger!

Turkey is a really versatile, but somewhat underused meat. It's incredibly lean which makes it very low in fat, but an excellent source of protein. The problem with using turkey in a burger or meatball is its inherent lack of fat. As is the bain of any Thanksgiving/Christmas cook, keeping turkey moist is the key to it being delicious.

If we are going to add in fat we may as well make it work for it's inclusion. Using feta adds flavour, fat and will bind the meat and breadcrumbs to make a lovely moist patty rather than a crumbly mess.


Ingredients: Makes two burgers

250g / 1/2lb ground turkey mince
1/4 cup feta cheese
1/2 cup breadcrumbs (a fabulous time to use up left over garlic breadcrumbs) 
Salt and Pepper

2 Whole meal pitta bread pockets
1 avocado
1 finely diced tomato
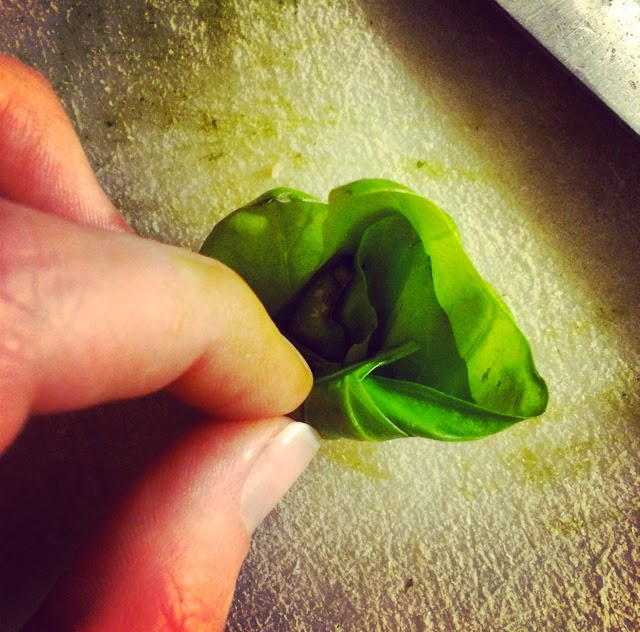
Small bunch of coriander/cilantro leaves
2 teaspoons sour cream

Method:

Place the breadcrumbs, turkey mince and feta into a large bowl. Use your hands to scrunch up the mixture until everything is well mixed. I don't like to use a food processor as it removes all the texture from the burger. If you mix the meat, bread and cheese to a paste you'll end up with a very texturally bland and dry burger.

Season the burger mix well with salt and pepper (if you are not confident about how much to use, you can fry a half teaspoon amount of the meat mixture in a hot pan until cooked, to taste and check your seasoning levels).

Form the meat into pattys and leave to 'set' in the fridge. By allowing the meat to cool and firm up in the cool fridge you eliminate the need for additional binders likes egg and flour in the mix. Leave them to chill for at least half an hour, though you can make them the day before you need them quite happily.

You can cook in a variety of ways, grilling, broiling, BBQing, pan frying, baking- however you prefer. I usually grill/broil the burgers as it frees me up to get the pittas, tomato salsa and avocado ready.

When grilling/broiling, the burgers will need about 10 minutes on each side, it's best to cut one open to check if they are cooked through if your burgers are particularly thick.

To serve, slice the avodaco and lay on top of the pitta, spread with a teaspoon of sour cream. Place your burger on top and spoon over some salsa made from finely diced tomatoes and chopped cilatro/coriander leaf.

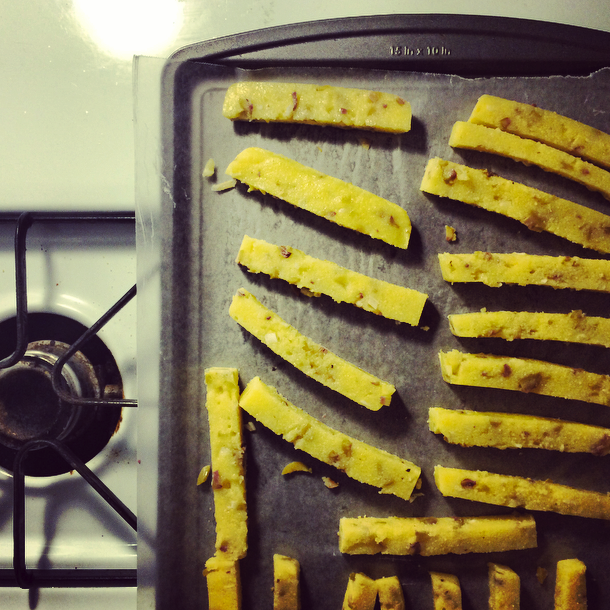
These go really well with Garlic and Olive Polenta Fries!


recipes

Garlic and olive polenta fries

June 27, 2014


Polenta always seemed mysterious and confusing to me until I started cooking with it. Then I realised it was the perfect combination of everything that is awesome and delicious about potatoes and pasta, but in one incredible foodstuff.

Polenta does need some help in the flavour department though, whether it's a ton of butter or loads of chopped herbs, it's a great vehicle for flavours and can be coaxed into a thick, creamy mashed potato consistency or set, chopped then fried or baked as i've done with this recipe.


Ingredients: This made enough for two of us as a side to our Feta Turkey Burgers (recipe soon!)

1 cup of dry polenta
3 cloves of garlic
1/4 cup green olives- use the ones in oil for...
a decent drizzle of herbed olive oil (from the olives!) or regular olive oil
Salt and pepper

Method:

You want to cook everything in the same pan so you don't loose any of the flavours. As such, the best pan to use is a medium sized, deep saute pan or a largish saucepan. You want a decent surface area to fry the garlic, but deep enough to contain the expanding polenta when it is cooking.

Finely chop the garlic and olives then fry the garlic in a little of the olive oil until it's started to colour ever so slightly. Take the pan off the heat and stir in the chopped olives. You don't want to fry the olives really, just heat them through so that they release their flavour and soften.

Pour the polenta into the pan whilst it is off the heat and stir into the garlic and olives so that the grains get a good coating of everything.

Cover the polenta with boiling water so that it's completely submerged with about half an inch of water over the top of it.  Put the pan on a medium high heat and let the polenta bubble for a couple of minutes, turn down the heat and leave to simmer for another 15 minutes.

The texture will start out very grainy, like really wet cous cous, as it cooks it will become thicker and more like mashed potato. To ensure that the polenta sets, so you can cut it into chips/fries, you want to cook it until it's very thick and smooth.

When it reaches the right consistency take the pan off the heat and glug in a good tablespoon or two of olive oil (preferably the herbed oil the olives came in), season with salt and pepper and mix in well.

Pour, or blob more likely, the polenta into a dish to set. Leave aside to cool or pop in the fridge if you want to cool it quicker.

Chop into fries, your preference on how fat, skinny, long or short you want them. I tend to go for a medium fat fry as they hold together better when baked.

Grease a baking sheet REALLY WELL. When I've used baking parchment some of the fries still stuck, so a double team effort of a non stick-pan and serious pan greasing is in order.

Bake in a pre-heated oven at about 350F for 20 minutes until golden brown.

Serve up as a side or as an appetiser with something like parmesan aioli or spicy tomato relish!


eating

Oh Boy Doughboy

June 25, 2014


I had heard mysterious tales of this Rhode Island institution ever since arriving in New England. Touted as a must-have item for any fairground trip my first experience of the doughboy was actually a savoury doughboy/pizza hybrid from the new Downcity Italian restaurant Rosalina.

The doughboy is essentially a pizza type bread dough that is deep fried until it's golden brown then topped with something. Traditionally it's powdered and granulated sugar, cinnamon is a pretty heavy theme Stateside so Cinnamon sugar is also a well known topping (and should, quite frankly, be mandatory).

The Rosalina fried dough was their take on the margarita pizza. Golden crisp dough is slathered in their home made, amazing red sauce then topped with parmesan, herbs, olive oil and some green scallions. It was incredible.

Had I only experienced one or the other I could resign myself to them being a treat one must acquire from a restaurant or fariground. But having been exposed to the mastery of both the sweet and savoury version I am going to HAVE to attempt to make these myself- if not just to pass on the knowledge to my British friends who may not have discovered the king amongst baked goods- The Doughboy.


entree

Block Island Scallops with Weisswurst on Spicy Red Pepper and Tomato Relish

June 23, 2014


There are certain flavour pairings that are meant to be enjoyed together.  Pork and seafood is one of them. The strong, often salty flavour of pork compliments the more delicate flavour of fish. The best pork and fish combinations involve a meaty texture, light flavoured fish and a strong, salty pork.

I had beautiful Block Island Scallops from The Local Catch and some meaty, savoury weisswurst from Chez Pascal's Wurst Kitchen- a match made in culinary heaven.

Pea and mint is often the triplet to the the pork and scallop twins. With the weiswurst being gently spiced and incredibly hearty I wanted a sweet and spicy relish that would stand up to this meaty couple.


Ingredients: To serve two

6 large scallops (the ones I had were BEASTS so I cut them in half to create two smaller scallops from one)
1 weisswurst- about 5 inches in length, if you can't get weisswurst a good quality pork sausage with pepper and herbs would work well

1 red bell pepper or 3 mini sweet red/orange peppers
1/2 red onion
2 cloves of garlic
1/2 teaspoon of dried chili flakes
1 tablespoon of white sugar
1 tablespoon of red wine vinegar

Method:

Start by making your relish.

Finely mince the garlic, and dice the pepper and red onion.

Fry the garlic in a little oil until slightly golden then add in the chili flakes. By adding the chili flakes at the beginning of the cooking it will mellow out the heat making it a light hum rather than a fierce burn- this is how I like it and how I think it's best compliments the scallops. If you're more of a burner then hold back the chili until towards the end.

Add in the pepper and onion, and fry on a medium heat until they are softened but not mushy, about 10 minutes.

Whack up the heat for 10 seconds and splash in the red wine vinegar so that it sizzles when it hits the pan. sprinkle over the sugar and cook on this high heat for about 2 minutes until most of the liquid has evaporated away. Turn the heat down low  and leave to simmer very gently so that the relish can reduce and become nice and sticky and jewel-like.

Slice the sausage into diagonal slices about half and inch/1cm thick, this isn't just to look fancy. By slicing diagonally you are creating a larger surface area and thus when fried, creating more space for caramelisation and lovely, delicious sticky bits!

Use a large frying pan to cook the sausages and scallops- I'll explain in a moment.

Fry the sausages in a very little oil for about a minute on each side, if you are using pre-cooked weisswurst as I was, or about 3 minutes on each side until cook through if using raw sausage. 

Swipe the sausages to the side of the pan, onto a part of the pan surface not directly above the heat, set the pan off center on the hob ring if you can. This will keep the sausage warm without over cooking it but give you space to cook the scallops in the sausage residue and fat.

Scallops take very little time to cook, you don't want to over cook them lest they become rubbery so keep these until the last minute to fry.

The best way to cook scallops is to use the clock meathod. Lay each scallop in the pan in a a large circle, placing each one down in turn in a clockwise motion. When you reach the first scallop again, turn it over and continue around the clock to ensure even cooking. 

Depending on how many scallops you are cooking with will dictate how many times you'll go around the clock. If you are nervous or unsure about cooking scallops I would suggest you keep going around the clock continuously until they are cooked, this way you won't over cook them as you'll see each stage of the cooking process. 

If you are a more confident about cooking them, lay out the raw scallops in a clock, when you reach the first leave them to cook and colour for the desired time. I laid out my 12 half scallops in a clock, left them for 1 minute then turned them over in order and left them for a further minute which was sufficient- more scallops mean less of a waiting period, fewer scallops mean more of a waiting period.

When your scallops are done, pile them onto the relish and (if you're feeling super fancy as I was) place the sausage slices atop your scallops.

If you are not feeling so fancy or can't abide a carb-less dinner then stir the relish into some fresh cooked spaghetti and top with your scallops and sausage.


eating

Cafe La France: Empire Street, Providence

June 20, 2014


This little gem is just around the corner from my office so I tend to pop in to grab some breakfast whenever I need a bit of an energy boost pre 9am.

It's what the Brits would call a 'Greasy Spoon' which sounds like a terrible insult, but it really isn't!

Greasy Spoon Cafes are a bit of an institution back home. They serve up honest, simple and often incredibly good value food, usually focusing on breakfast and the famous 'Full English'.

Rarely does food get faffed about with at a greasy spoon: You ordered an egg sandwich? You'll get buttered bread with an egg in it- an egg sandwich by any other name. That's why I like Cafe La France so much, they do what they do and they do it really well.

My go to on an energy-slump morning is a bacon and cheese croissant with a latte. Also a brownie sometimes. Ok most of the time. 

For the grand total of about $8 (about £4.70) I get my freshly filled bacon and cheese croissant, a decent sized latte and a slab of brownie that's the size of my face. If that's not good value I don't know what is.

I've said before that writing about where I eat isn't about reviewing the places, it's about the flavours and experiences that influence my cooking and recipes.
What Cafe La France reminds me is that simple food and simple flavours are something to be proud of and do well. There is a time for fancy pants stuff and there is a time for keeping things simple.


Cafe La France, 73 Empire Street, Providence, Rhode Island

entree

Bacon basil stuffed jackets

June 16, 2014


You really can't beat a baked potato if it's done well. That means giving it some oven time. Though sticking a potato in the microwave for 10 minutes will provide you with a decent, hot base for a meal, jackets truly come into their own when they are truly baked.

The microwave gets the cooking started but you should give your tatty at least 20-30 minutes in an oven to crisp it up and make the inside super fluffy and rich.

Potatoes are also super cheap so beefed up with a couple of pantry staples and a little bit of fresh stuff they make an excellent budget friendly meal.


Ingredients: Per potato (these are pretty filling, we ended up sharing one with a salad for dinner)

1 large baking potato- I've used white skin, russet and red skin potatoes and they've all been delicious
3 strips of bacon (Brits use streaky or 2 rashers of normal bacon)
A couple of drizzles of olive oil
1/2 tablespoon ricotta
1 tablespoon grated parmesan
1 teaspoon dried basil
Salt and pepper

Method:

Microwave your potato for 6-8 minutes depending on it's size. You want it to be tender but not completely squashy.

Whilst the microwave is microwaving, finely chop the bacon and fry until crisp. I find frying it on a lower heat for longer makes it most flavourful. When your bacon is lovely and crisp, leave it to drain on some paper towel.

When the potato is done, smother a little oil, salt and pepper over the skin of the potato- this will help it crisp up really nicely and bring out it's natural deliciousness.

Slice the potato in half lengthways and scoop out the flesh leaving a wall of potato attached to the skin that's about 1/2 inch or 1 cm thick.

Put your bacon, potato scoopings, ricotta, half the parmesan, a drizzle of oil and basil into a bowl and mix. Try not to create too much of a smooth paste, chop the ingredients together so you retain some texture but the bacon, ricotta and basil is distributed throughout the potato.

Pile the mixture into the potato shells and sprinkle over the remaining parmesan, return them to the oven for about 20 minutes at 350F until the skins are dark brown and crispy and the parmesan has melted into a golden crust atop the stuffed shell.

Serve up with a salad with lots of lovely fresh tomatoes to go with the rich basil and olive oil flavours of the potato.

Another great filling for baked potatoes is Quick Hob Beans!


entree

My Pad Thai

June 13, 2014


On our way back from San Diego we stopped to get some late night food in the airport. Usually a completely uninspiring occasion, I was actually pretty taken with the Thai nook in Terminal 2. Though we didn't eat there in favour of the bar (obviously) I've had Pad Thai on my mind ever since.

Arriving home after a red-eye flight full of very unhappy babies and a vast about of conditioned air, we were both feeling pretty ropey so Pad Thai with lots of fresh vegetables seemed to be a pretty sensible dinner option.

As with any of my recipes for foods inspired by countries and traditions apart form my own, this is my take on something that inspired me. Apologies to the entire Thai nation in advance.


Ingredients: Serves 2

1 cup turkey mince
1/2 cup unsalted, roasted peanuts
2 baby bok choi
4 spring onions/scallions
1/2 red onion
handful green/string beans
4 cloves of garlic
Thumb sized piece of fresh garlic
Drizzle of sesame oil
Tablespoon low sodium soy sauce
Juice of half a lime
1 tablespoon of minced lemon grass (I couldn'tget a fresh stalk so used the pre minced stuff which was fine)
2 eggs
Rice noodles (the amount depends on the noodle/vegetable ration you fancy, I used as many as would fit in the circle made by my thumb and index finger)
Salt and pepper

Method:

Cover the rice noodles in boiled water in a bowl and leave to soak for about 20 minutes until al dente.

Finely mince the garlic, ginger and lemon grass (if not already so) and mix together into a fragrant paste. Dollop half of the paste into a frying pan on a medium heat and fry gently for about 2 minutes. Crumble in the turkey mince and fry until it's become white and opaque but not started to colour. Crush the peanuts under a mug so that some are crushed very small and some are merely split in half. Pile the peanuts into the frying pan, season with salt and pepper and continue to fry gently until the turkey has coloured slightly. Turn out the heat and set aside until you are almost ready to plate up.

Finely slice the bok choi, scallions, onion and green beans then stir-fry in the remaining garlic/ginger/lemon grass paste. When the vegetables have wilted a little, splash in the soy sauce and allow to fry away and reduce to nothing. Season with pepper but hold the salt as the soy is quite salty.

Pile in the drained noodles and toss through with tongs, crack and whisk the eggs into a bowl or cup then pour over the hot noodles and vegetables, remove from the heat and leave to stand for 2 minutes so that the egg partially sets.

Turn the heat on under the turkey pan and fry until coloured golden and piping hot.

Toss the vegetables and noodles again to distribute the remaining raw egg and allow it to cook in the residual heat. When the egg is cooked, squeeze over the lime juice and drizzle over the sesame oil, then pile the vegetables and noodles into a dish and pour the turkey and peanuts over the top.

Serve with extra lime wedges for added zing.


drinks

Cocktails at Cook and Brown

June 11, 2014


Date night last week hit two top local spots in our new neighbourhood, Chez Pascal's Wurst Kitchen and Cook and Brown. We managed to fit in both spots by pre-agreeing not to get distracted by C&B's menu, sit at the bar and keep our minds on the sausage. It was tough, particularly as (unknown to us) C&B have Burger Wednesday. Bugger (or burger- ha!)

This has been pencilled in for another date night so prepare to see another C&B post soon!

With it having been a gloriously sunny day we were in the mood for summery cocktails and damn did C&B deliver on that front.

The fabulously lovely Sam, whom we met for the first time in The Dorrance when we'd pretty much just stepped off the boat, was shaking up the drinks and lamenting (for us!) that we weren't burgering that evening.

A man of habit, I did manage to coax Charlie away from his classic Vodka Martini into something from the C&B menu, his poison of choice, The V&T:

Square one cucumber vodka, jack rudy tonic, rosa water and soda.

I, ever seduced by a bit of fizz went for the Bubbly Bee:

Hayman's old tom gin, lemon, vanilla, honey, lavender and bubbles.

There are cocktails and there are cocktails. The former come from a premix with a dash of something alcoholic and maybe a slice thrown in for good measure. The latter being the only ones anyone should, consume or care about, the ones that are crafted in front of you from interesting ingredients and do not glow in the dark. Cook and Brown cocktails definitely fall into the latter category.

Charlie's V&T was light, refreshing and ever so slightly floral. The freshness of the cucumber softened by the rose water but not in such a way that he felt like he should be holding a toy battleship to compensate.

My Bubbly Bee was softly sweet with the sharpness of the bubbles cutting through the honey hum. My pet hate with cocktails is when you feel like your drinking neat sugar watered down with booze, I maintain that most of my hangovers are sugar induced and have nothing to do with alcohol. MAINTAIN. The vanilla, honey and lavender had me thinking I might be in for an, expertly crafted, sugar high but thankfully not. Every flavour was discernible, playing it's part but not fighting to be tasted and ending up in a fuggy, flowery, saccharine mess.

I find it a real turn off to enjoying food and drinks when the creators of said food and drinks tip over the edge of being passionate about what they make and become food snobs. Or more accurately: artisan arseholes.  When someone dictates how something should be enjoyed, berates you for not appreciating something correctly or makes you order something you don't want because they know better- run, run far far away from that place.

Sheer, unbridled excitement and delight in seeing people enjoy things you have to offer, the ingredients and flavours you provide and the experience people have enjoying what you make, however, is awesome. Sam is awesome.

Finishing up our drinks, a beautiful pink glass of deliciousness appeared before us. Though tempted to dive right in we did the honest thing of admitting a drink meant for someone else had been delivered to us.

So excited to share a new cocktail ingredient with us, Sam had mixed up a special little something just for us to try this new liquor. Sweet and bitter, sharp and zingy, our un-named concoction was the perfect way to end our evening with C&B.

We shall be back for Burger Wednesdays and the pink cocktail (Charlie with battleship in hand).


Cook and Brown Public House959 Hope St, Providence, Rhode Island.


recipes

Coronation Chicken Naan Sandwich

June 09, 2014


It's time for Indian food again! A little pang of homesickness (possible brought on my new office picture from a colleague) made me crave my all time favourite sandwich filling from the realm- Coronation Chicken.

Originally made to celebrate the coronation of Queen Elizabeth, it was inspired by Jubilee Chicken, also made to celebrate a royal occasion- George V's silver jubilee.

Having finally found some pre-made naan bread in the market (I make my own when I have the time but pre-made are always a timesaver, especially for lunches) I thought it about time to whip up some corrie chicken.

Ingredients: Makes 2 sandwiches

2 Naan
Chicken (for a lunch I would use about 1 breasts worth of chicken- freshly grilled and cooled, left over roasted chicken or shredded cold cuts)
2 tablespoons mayonaise
1 teaspoon curry powder
1 tablespoon mango chutney
2 tablespoons slices almonds
Salt and pepper

2 tablespoons yoghurt
1 teaspoon dried mint
About 2 inches of a cucumber

Cucumber
Red onion

Method:

Mix together all the ingredients for the chicken filling and combine well.

Grate about two inches of the cucumber into a separate bowl then add in the yoghurt and dried mint, mix well and season with a little salt.

Pile half the chicken into a naan, drizzle over some of the yoghurt dressing then top with finely sliced red onion and shaved cucumber.


hints

Chopping Herbs

June 06, 2014


I do sometimes wonder what I should write about when it comes to hints and tips. So many of the things I do instinctively now were once awesome little finds, bits of advice from well seasoned home cooks or experiments that turned out to be incredibly useful.

I also once saw a bit of advice (I actually think it was on Pintrest which only goes to show that it is a font of knowledge indeed) calling out people who are rude about (seemingly) obvious or simple tips and ideas. 

"Something is only obvious once you know it"

A tip, hint or piece of advice is new to everyone at some point in their life, that's not to say it's alright to tell all and sundry what to do and how to do it but it does make it alright to offer simple advice to those who seek it out. 

The advice I give is not intended to be ground breaking- you are unlikely to find any life changing hacks here! It is simple ideas that I have discovered myself or been taught by friends and family to make my cooking life a whole lot easier.

If they are new to you then I'm glad they might be of use. If they aren't then I hope I might have something else that is useful to you, or it reminds you that once upon a time you learnt how to do this for the first time so maybe pass on your tips to someone else.

Chopping Herbs:

Fresh herbs can be a bit unruly when you are trying to chop them finely. 

Best case they make a massive mess, worst case you end up hiding fingers under bunches of greenery and chopping the wrong thing!

I've found the best way to wrangle fresh green herbs is to pile them into as ordered a pile as you can manage then roll them into a fat sausage. Just keep rolling over and over to tuck in as many of the stragglers as you can. If the ends of the sausage are splaying out all over the shop then simply fold them under the sausage and roll them up until they behave.

When you have a nice fat, green sausage of herbs, use a sharp nice to finely slice through the sausage to get thin stands of leaves. These can either be sprinkled across dishes as emerald strings or chopped up further, it being easier to do the latter now as the strands are far easier to control than the springy full leaves!


breakfast

Quick Hob Beans

June 04, 2014


This is a great quick alternative to proper oven baked beans that can be topped with an eggs and side of bacon for breakfast or piled into a bake potato with pulled pork for dinner!

If I can make something instead of getting it out of a can or a packet I will, I like knowing what's in the food I'm eating and serving. Sometime this can mean a little extra work, sometimes it can mean a lot of extra work. Whilst these are a tiny bit more involved than opening a can a dumping the contents into a bowl and into the microwave it's really, really not a huge amount more.

Ingredients: Makes enough for 2 generous servings

1 can of cannellini beans
2 cloves of garlic
1 pint punnet of cherry tomatoes
1/2 cup water
1/2 teaspoon ground coriander seed
1/2 teaspoon ground cumin
1/2 teaspoon ground ginger
1 tablespoon of red wine vinegar
1 tablespoon of soft brown sugar
Salt and pepper

Method:

Finely chop the garlic and fry in a little oil with the spices until the garlic is slightly golden and the spices toasted- about 3 minutes on a medium heat.

Chop the tomatoes in half and add them to the spices and garlic, fry on a medium high heat for about 5 minutes then splash in the red wine vinegar. Let the vinegar sizzle away until it's reduces to almost nothing then add in the water and sugar. Turn the heat down to medium and allow to simmer for 10 minutes until the tomatoes are soft and mushy. Use a stick blender to blitz the tomatoes into a thick sauce. I like to keep it a little chunky but it's entirely your preference how smooth you fancy.

Drain the beans then add to the sauce and cook through until hot, season with salt and pepper then enjoy!


recipes

Roasted Potato Salad

June 02, 2014


I served this us with the Pan Fried Cod with Pea, Mint and Lemon Salsa dish I posted recently. Again, it's a slightly lighter version of the traditional British fish and chips I find myself missing every now and again!

Ingredient: Serves 2

2 large potatoes
2 tablespoons of oil- vegetable, canola, sunflower, not olive.
Heaped tablespoon of light sour cream, I would use creme fraiche but it's not as readily available here as it is in the UK
Heaped tablespoon of mayonnaise
1 teaspoon of dried tarragon
Salt and pepper

Method:

Peel the potatoes and chop into chunks that are about 1 inch square- there's no need to have them exact, but you want them to be a similar, medium size so that they cook at the same time and get crisp but stay fluffy inside.

Blanch the potatoes, tumble them into cold water and pop on a high heat. Let the water get to boiling point and continue to let boil for about 2 minutes, then take the potatoes off the heat. They will not be cooked all the way through, just the outside will be softened. This is fine as you'll be finishing them off by roasting them in the oven. Drain the potatoes and put them back into the sieve or colander to steam 'dry' for about 10 minutes. By letting the potatoes steam, the excess moisture will evaporate away and leave the edges of the potatoes crumbly and ready to crisp really well in the oven later.

Drizzle about two tablespoons of oil onto a baking tray. Use sunflower, canola or vegetable oil rather than olive oil. Olive oil's smoking point is not that high, so you won't be able to get it to prime crisping heat with out filling your oven and kitchen with a lot of smoke.
Slide the tray into the oven and allow the oil to heat for about five minutes until it's shimmering hot and runs like water when you tip the tray.

Tumble the potatoes onto the baking dish, being careful not to splash the hot oil! Grind over some salt and pepper then jiggle the potatoes around in the oil so that they are coated on all sides. Pop back into the oven and bake for 25-30 minutes until the potatoes are golden with crispy brown edges.

Whilst the potatoes roast, mix the sour cream/creme fraiche and mayo together with the tarragon.

Allow the potatoes to cool slightly for 5 minutes so that their heat doesn't curdle the mayo mix, you want them to be warm but not too hot to handle. Mix them into the creamy dressing then season to taste.