baking

Baking Butter

August 27, 2014


Whilst the traditional notion of 'all butter' baking sounds like the indulgent, quality way to go, it can often result in tough, solid cakes.

When baking light sponge cakes (and note this is all about cakey baking not pastry baking) I find that margarine or those 'It's not really butter but we tricked you (haha!) into thinking it really is butter' products are the best thing to use. 

This is because, other than when it's being mixed or fresh out of the oven, butter is solid. Using straight butter in a cake that's going to be stored in a cool place for any length of time will result in a pretty solid, heavy cake.

That being said, you don't necessarily need to double up on your dairy products every time you shop. If you are anything like me and get a bit freaked out when product ingredient lists stuff that should only be kept in a lab somewhere and not in my pantry, you'll be better off making your own.

Simply mix together 3 parts butter with 1 part oil (use a flavourless oil like vegetable, sunflower or canola) to make your own baking butter. You will still have the lovely rich flavour of the butter but have a lighter consistency when cool, and without a whole host of weird stabilisers, flavourings and chemicals.

I tend only to mix up a batch to satisfy which ever recipe i'm about to bake, but any left over will keep in the fridge until the use-by-date of the butter you've used.


Chinese

Egg Fried Rice

August 25, 2014

Egg Fried Rice Recipe Chinese Side

Egg Fried Rice Recipe Chinese Side

Egg Fried Rice Recipe Chinese Side

Egg fried rice is a great little side dish, and with a few added extras it can be a super thrifty, easy entree.

Eggs are a cheap protein and rice is equally good value, so you can make a really filling meal on a tiny budget.

I really like egg fried rice along side saucy, spicy dishes. It mellows out the heat from hot spices and soaks up all the loveliness as well. I really love this fried rice along side my Crispy Chilli Beef (recipe coming soon!)


Ingredients: Make enough for 2 main meals or 4 side portions

1 cup/200g rice
3 large scallions/spring onions
1/2 cup/70g peas 
1/2 cup/70g bean spouts
3 eggs
1 tablespoon soy sauce
1 teaspoon sesame oil
A little splosh of cooking oil
Salt and pepper

Method:

Pour your rice into salted boiling water and cook until tender. When it's cooked, drain and keep to one side in the sieve.

Crack the eggs into a mug or bowl and whisk with the sesame oil, soy sauce and pepper (the soy sauce is very salty so you shouldn't need to add extra salt).

Slice your scallions and fry in a little oil in a large frying pan for about 2 minutes on a medium heat, then add in the peas and bean sprouts. Continue to cook on a medium heat for a further 2 minutes then add in the rice. You want to use a large frying pan, it will feel excessive for the amount of vegetables but you want to be able to mix the rice well when you add the eggs and space is key!

Mix the rice well with the vegetables, making sure to break up any clumps. Fry for a minute or two to get rid of any excess water that may have been hiding in the rice.

Turn the heat down to low and pour over your eggs. By turning down the heat you control how quickly the egg sets, allowing you to mix it well and reduce the chance of any big fat bits of scrambled egg in with your rice.

Mix the rice and egg well until everything is coated, at this point leave it to cook for a minute. After the minutes cooking, mix up the rice then leave again without stirring. Continue to do this until the egg is completely cook, this will create some strands of egg within the rice without it being too clumpy.

When there is no liquid egg remaining your rice is ready. Brilliant as a side dish, you can also bulk this up in to a main meal by adding in some extra ingredients. A couple of suggestions are:

Add along with the scallions:

  • Raw prawns
  • Marinated Tofu
  • Wild mushrooms


Add along with the rice:

  • Shredded chicken, beef or pork
  • Cooked prawns


Top the finished rice with:

  • Flaked salmon
  • Whole fried egg


Egg Fried Rice Recipe Chinese Side


baking

Creamy Baked Bacon Gnocchi

August 22, 2014


This is a complete indulgence and the ultimate comfort food.

Soft, unctuous gnocchi tucked up in a thick, garlic cream sauce, peppered with rich bacon and topped with baked cheese. Yep, I know, this is the one. (But maybe not one for everyday!)


Ingredients: Serves 2

About two cups of gnocchi pieces- use this recipe
2 cloves of garlic
6 strips of bacon
1 cup heavy / double cream
1/2 cup freshly grated parmesan
Pepper

Method:

Cook the gnocchi as per normal in boiling salted water. They will take about 3-4 minutes if fresh, closer to 8-10 minutes if frozen. Spear a piece of gnocchi to make sure it's cook all the way through once they start to bob to the surface.

Take the gnocchi off the heat, drain and allow to steam 'dry' in the sieve whilst you prepare the sauce. You don't want too much excess water in you bake as it will thin out the sauce.

Chop the bacon and fry in a large frying pan. Finely mince the garlic and add to the bacon pan, the bacon fat means you don't need any additional oil or butter. Cook on a low to medium heat as garlic can over cook very quickly. A lower heat gives you more control whilst slower cooking brings out a sweeter flavour in the garlic and renders the fat from the bacon giving it a richer taste. Fry on the low heat for a good fifteen minutes until the bacon is dark, rich red/brown and the garlic is sticky and lightly golden.

Add in the cream and mix well, turn up the heat a little and let the cream simmer for a couple of minutes. Season well with pepper, the bacon will add salt to the dish and I've found you don't need to add extra.. my one healthy concession in this meal!

Tumble the gnocchi into a baking dish, for this two person portion the baking dish was about half the size of sheet of letter/A4 paper. You want a deep sided dish so that the gnocchi can nestle in the bacon cream and be well coated.

Pour the cream over the gnocchi, giving the dish a jiggle to redistribute the gnocchi and coat them in the cream. Pile over the cheese and pop everything in the oven at 375F for 35-40 minutes.

The baking will thicken the cream, brown the top, bubble the cheese and, basically, make this the best thing you will ever eat ever.


baking

S'mores Brownies

August 18, 2014

smore s'more brownies marshmallow graham cracker

smore s'more brownies marshmallow graham cracker

smore s'more brownies marshmallow graham cracker

smore s'more brownies marshmallow graham cracker

smore s'more brownies marshmallow graham cracker

So we've dealt with savoury portion of the camping menu, let's get down to what's really important. The s'mores.

Only on this very recent camping trip did I finally discover what a s'more was all about (and combat some weird compulsion I have to called them sch'mores like some range of Ikea lampshades).

What stuck with me, apart from copious amounts of melted marshmallow, was the sweet and salty combination. Usually reserved for fancy pants confections like sea salted caramel, the salt and sugar combo is always a winner. It was the salt in the Graham Crackers (Digestive biccys for the Brits) that made these so s'moreish, without that savoury tang I'm pretty sure my teeth would have bled from the sugar overdose.

Bearing the salt, chocolate and toasted marshmallow combination in mind whilst compensating for most modern kitchen's lack of an integral campfire, I made up some S'more Brownies.


Ingredients: Makes 16 bars or 32 bitesized portions*

Graham Cracker/Digestive Biscuit- (you can use pre-bought or make your own as I did)
1/2 cup/60g flour
1/2 cup/40g old fashioned oats
1 teaspoon baking powder
1 teaspoon salt
1/2 cup/100g soft brown sugar
1/2 cup/110g butter (salted)
3 to 4 tablespoons milk

The rest-
4 eggs
1 cup/200g white sugar
1 cup/220g soft brown sugar
1/2 cup/110g butter (melted)
1 1/4 /160g cup cocoa powder
2 teaspoons vanilla essence
1/2 cup/60g flour
1/2 teaspoon salt
2 1/2 cups/140g marshmallows
1/2 cup/130g chocolate buttons or split into small chunks (I used Hershey)

Method:

If you re making your Graham Cracker/Digestives then start with these.

Combine the flour, oats, butter, sugars, baking powder and salt in a food processor and pulse until everything is combined. You can do this by hand but it will be a lot more work, start off by smashing and smushing the butter into the oats and flour then work through all the dry ingredients until it's well mixed.

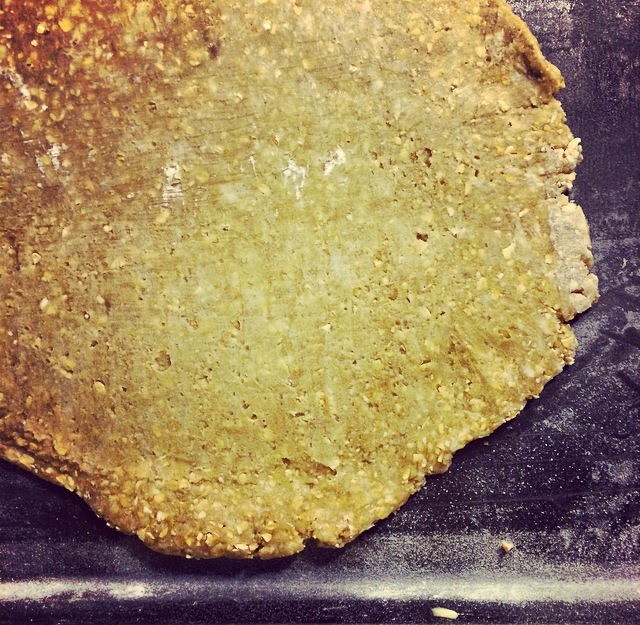
Drip in a little milk at a time until you have a dough, bring it together in a ball but do not over work it. The if your mixture is super sticky, pop it in the fridge for a couple of minutes to harden up the butter. Place the dough on a sheet of waxed paper with another sheet on on top. Roll out the dough to about 1/2 inch/1 and 1/2 cm thick, peel back the papers and pop onto a VERY well greased baking tray.

Bakin in the oven at 150 for about 10-12 minutes. The edges will be a golden brown and the center golden, it will still be soft to the touch but harden when it cools. It's better to take it out too soon, let it cool and test the hardness of the cookie/biscuit, than over cook it in the first place!

Let the cookie/biscuit cool and harden whilst you prepare the rest of the brownie filling.

Tumble the marshmallows into a metal dish, you will be using the grill/broiler to toast them so you don't want them in a dish that will shatter under direct heat. If you have a cook's blow tourch you can use this, which ever method you use, go gently, never take your eyes off them and have some water nearby just in case. When marshmallows catch fire they go quickly, when by a campfire outdoors you can abandon them in the flames or just drop them. This is clearly not an option indoors!

If you are grilling/broiling them, have a large baking sheet handy so that if they do catch you can smoother them in the pan with the baking sheet, turn out the heat then remove them from the oven safely.

If in doubt leave them untoasted!

Once toasted a light golden, brown leave them to cool whilst you mix up the brownie batter.

Whisk the eggs into a fluffy froth and add in the remaining dry ingredients and melted butter.

Break up your chocolate and sprinkle it into the brownie pan, I used a 2 inch/5cm deep baking tray that was about the size of an A4/letter sheet of paper.

Rip up your toasted mashmallows and poke into the pan with the chocolate chunks/buttons, if you are finding the marshmallow super sticky dust your fingers with icing/confectioners sugar.

Break up the cookie/biscuit into chunks that are no smaller than an inch square and spread these throughout the pan then pour oven the brownie batter.

Shake and tip the plan to dribble the batter all over the s'more ingredients and makes sure there are not empty nooks.

Bake for about an hour at 350F.

Test the brownie after about 45 minutes to check on it's progress but sticking a sharp knife or skewer into the middle. Be sure to poke a bit that's mostly brownie batter rather than marshmallow as these will be mushy form the heat. If the skewer comes out clean then they are done.

Let them cool in the pan and resist the urge to try and cut them until they are COMPLETELY cool. These are a seriously ooey gooey treat and MUST be completely cool until you try and divide them up or them will just mush under the knife.

*I started by cutting mine into 16 bar shaped portions but as they were so rich I then divided them up into 32 bite sized portions... this did not stop me eating 5 of them though.


smore s'more brownies marshmallow graham cracker


baked potatoes

Campfire Chilli

August 15, 2014


Campfire chilli con carne baked potatoes camping

Campfire chilli con carne baked potatoes camping

Campfire chilli con carne baked potatoes camping

Campfire chilli con carne baked potatoes camping

Campfire chilli con carne baked potatoes camping

We recently spent a dreamlike weekend up at a friend's parent's home, perched on the edge of a lake in New Hampshire.

It couldn't have been any more of an all-American outdoor life idyll if it had tried. We were blessed with some fabulous weather, even though the forecast had predicted otherwise, a beautiful location and a universal attitude to having some good clean (well fed) fun.

The first night was whiled away in front of the fire, lubricated by the spoils of a stop off at one of New Hampshire's state liquor stores, and set the scene for what would be one the best weekends we've had since touching down just over a year ago.

Knowing there would be the chance to cook on a open campfire I got myself a cast iron dutch oven. Having lusted after the brightly coloured French variety, I was delighted to find a slightly more budget friendly un-enameled version from Lodge. Though not a shade of pastel, this is a proper, solid cast iron pot that will last forever and has not completely rinsed my checking account. I got mine from the ever obliging Walmart for about $50, along with the Lodge catalogue that now forms my bedtime reading and majority of my birthday wish list.... My birthday is in December.

To the chilli.

Ingredients: (Makes A LOT of chili, I used a 7 gallon dutch oven which fed 10 with some to spare)

3 1/2 lbs Beef- use a cheaper cut like brisket, shin or chuck. You want some marbling as slow cooking renders the fat gentle and turns cheap, fatty cuts into something spectacular.
5 cloves garlic
2 tablespoons cumin
2 tablespoons ground coriander
1/2 tablespoon cinnamon
1/2 tablespoon freshly ground black pepper
1 tablespoon dried chili flakes (more if you like it really hot)
1/2 table spoon instant coffee granules
Slug of olive oil
2 red onions
2 lbs fresh tomatoes
2 tins red kidney beans, drained
1 can beer
2 'cans' water
Salt

Potatoes to serve

Method:

Even though it's in the title, this can be cooked on a stove top or in the oven as opposed to a campfire. Though if you have the chance to cook over an open fire I really urge you to do it, it's so much fun to cook outdoors and creates a great bit of entertainment for everyone!

If your beef is not already chopped into hunks then cut it into roughly 2 inch cubes. Remove any very hard pieces of white fat but leave softer fat and any marbling as this will make the chilli unctuous and the meat very tender. Marinate the beef over night for the best flavour. Rub the spices, coffee and garlic but NOT the salt over you beef with the oil, squash into a dish and cover with cling film before popping in the fridge to infuse.

Salt leaches moisture from whatever it is near, that's why you salt aubergine before cooking it or why your salt may clump in its pot when stored near somewhere with moisture in the air, like by a cooking area or sink. If you add salt to your overnight meat marinades it will draw a lot of moisture from the meat and make it tough when cooked. It's best to marinade with herbs, spices, vegetables and oils, then add salt to taste during the cooking process.

If intending to cook in the oven then start the pan on the stove for the frying stage.

When you are ready to cook, heat up your pan and slug in a little oil. Throw in your sliced red onions and fry until translucent and soft.

Add in the meat and fry until it has a good dark colour on all sides. Add in the tomatoes, beans, beer and water and stir well. Pop the lid on an allow to come to a high simmer, when the liquid is bubbling but not boiling, turn down the heat if cooking on the stove or, if cooking in the oven, pop in a preheated oven at 340F. If you are doing this cowboy style on an open fire, move the pot to a less fierce part of the fire, the pot itself will retain a lot of heat you you can move it off the direct flame and it will continue to cook.

A lovely, simple side to go with chilli is baked potatoes. The best way to do campfire potatoes to neglect them terribly. Wrap them in foil, throw them on the embers or on the grill  and leave them to bake alongside the chilli. If you are going for the long haul campfire chilli (over 2 hours) resist the urge to throw your tatties on until about 2 hours out from wanting to dig in. The two hour mark is the optimum time for lovely soft, buttery potatoes with great tender skins.

How long you cook the chilli really depends on how much time you have. As long as you keep and eye on the liquid level in the pan (you want everything to remain coated in the sauce, if things gets a bit dry add a little water) this chilli can slowly stew away on a low heat for up to 5 or 6 hours. At a minimum you want it to be cooking gentle for at least 2 hours. By this time the meat should be soft, tender and falling apart. The sauce will be thick and rich with tomatoes that have squashed down to a tangy sauce and the spices mellowed to give a lovely humming heat. Don't forget to season the chilli with salt prior to serving as it was left out of the marinade.

I always serve up chilli with sour cream regardless of it's heat, I like the hot and cold contrast and sour cream goes especially well on lovely rich baked potatoes!

Campfire chilli con carne baked potatoes camping


baking

Mushroom Biriyani with Cauliflower Rice

August 13, 2014

Mushroom Biriyani with Cauliflower Rice Curry Recipe

Mushroom Biriyani with Cauliflower Rice Curry Recipe

Mushroom Biriyani with Cauliflower Rice Curry Recipe

Mushroom Biriyani with Cauliflower Rice Curry Recipe

Mushroom Biriyani with Cauliflower Rice Curry Recipe

I've seen this little rice cheat hanging about on Pinterest and recently had the thumbs up from my cousin that it is in fact a real thing and not a giant Pinterest lie.

By substituting the rice for cauliflower rice in this mushroom biriyani you can make a flavour packed evening meal with so few calories it would be rude not to eat a giant cake for pudding afterwards... or pat yourself on the back for exercising some healthy restraint.


Ingredients: Serves 2 very generously with left overs for someone's lunch

2 teaspoons curry powder
2 teaspoons ground cumin
2 teaspoons ground coriander seed
1/2 teaspoon dried chili flakes (for a very light hum of heat, more if you like it spicy)
2 cloves garlic
1/2 cup coconut milk
1/2 can chopped tomatoes
1 medium white onion
1 pint punnet chestnut mushrooms
1 medium head of cauliflower -about 2 cups of flower 'flesh'
Salt and pepper

Method:

Begin by preparing your rice. You will need a food processor for this, I've bumbled along without one since arriving in the States, using a stick blender or accepting a new chunky style of cooking. Cauliflower rice needs to be made in a processor or it's just chopped cauliflower, because how every much time you have you will not be chopping it as small and as uniformly as the processor can do in 30 seconds flat.

Remove all the green leaves from the head of cauli then chunk into processor manageable portion. Blitz until the cauliflower its well chopped and is the size and consistency of... well... rice.

Finely slice the onions and mushrooms, and mince the garlic.

Using a large, deep frying pan or a stock pot,fry the spices on a medium high heat in a little drizzle of oil for a few minutes to release their flavours then add the onion and garlic. When the onions and garlic are fully coated in the spice oil and have soften slightly, add the mushrooms and stir fry together for 8-10 minutes until the vegetables are soft and all their juices have been reabsorbed.

Turn the heat under the pan down to low and scoop the cauliflower rice into the pan, mix well with the fried vegetables until the cauliflower is well coated, season with salt and pepper.

Add the coconut milk and tomatoes, mix in well then pour everything out into a baking dish and pop into the oven at 370f/190c for an hour.

Check half way through cooking, if any of the bits of onion or cauliflower that are 'sticking up' are burning, just poke them back down.

After an hour, remove from the oven and leave to rest under some foil for about ten minutes, or however long it takes you to gather your plates, utensils, accompaniments and meal companions. This resting time will let the cauliflower soak up a little bit of of the juices and become extra tasty!

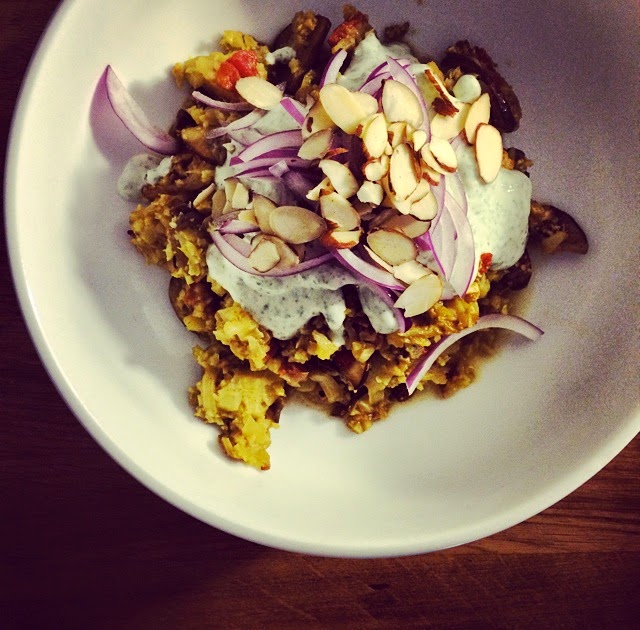
Serve with some zingy mint raita (a couple of spoonfuls of greek yoghurt blitzed with mint and a shake of salt and pepper) and topped with sliced almonds for some crunch.


Mushroom Biriyani with Cauliflower Rice Curry Recipe


chicken

Velveting Chicken

August 11, 2014


Velveting chicken is a traditional Chinese technique for preparing chicken for cooking. It keeps then chicken succulent and juicy when cooked in a stir-fry, but is a great way to keep breast meat (which is notorious for becoming dry easily) from drying out in many other dishes like pies or bakes.

Mix up a marinade of egg white and cornstarch/cornflour, how much of each will depend on the amount of chicken you are preparing. A ratio 1 egg white to 2 table spoons of cornstarch/cornflour is usually about right, you want the consistency to resemble single cream/half & half.

Coat the chopped, raw chicken in the mixture and leave to marinate for at least half an hour, fry the chicken in a little oil until it have become opaque white all over.

At this point you can set the chicken aside, ready to use in any dish as you would raw chicken. The meat obviously will still be raw in the center and will require extra cooking but this will done as part of the finished dish preparation.

You can marinate the chicken over night but do not fry it until you are ready to prepare the full dish, you don't want to have half cooked chicken hanging about and making people poorly!

Whilst traditionally used with chopped chicken breast (as it needs a lot of help to stay juicy) this can be used with other meats and is particularly useful when using turkey, another one for drying out!


dessert

Summer Supper with Grace Karon of 'Musings from Grace'

August 06, 2014


summer supper menu salad shandy

summer supper menu salad shandy

summer supper menu salad shandy

summer supper menu salad shandy

summer supper menu salad shandy

summer supper menu salad shandy

summer supper menu salad shandy

summer supper menu salad shandy


Sharing food must be one of the best things in the world. Sharing food with friends in the Summer doesn't get much better than when there's also a decent amount of shandy hanging about as well!

I spent a wonderful evening recently, cooking up a summer spread storm with my beautiful friend Grace Karon of 'Musings from Providence', soon to become 'Musings from Grace' as she is leaving this little New England city and heading south to Texas!

Grace is a very new type of friend to me. We met through our bloggy, online lives and decided that with this much red hair, love of food and all things pretty flying about we had to meet and become friends immediately.

Also being a New England import, though not from British shores, she completely understood my initial struggle to settle into a new place. Thus a friendship that was born on the internet, nurtured in Faust and The Hot Club, and completed with a hot date back at my place, has been the least creepy thing ever to happen to me.

With new adventures taking her to Austin, Texas in the coming weeks I shall be desperately sad to say goodbye, but feel incredibly lucky to call Grace my friend and continue to check flight prices to
Austin–Bergstrom International Airport on a semi-daily basis.

To celebrate and commiserate her imminent departure we felt that spending the evening cooking, taste testing (read: slugging back) shandy and decorating the kitchen with pretty things would be the perfect way to mark the occasion.

Grace found some fabulous recipes from Not Without Salt and brought a fabulous range of shandies and  decorations whilst I provided the location, some Courgette & Parmesan Bread Rolls and plans for a peachy dessert (which post shady fest, we decided would be something for another day).

On our menu:

Courgette and Parmesan Bread Rolls (recipe on HLTC soon!)
Rainbow Tomato Salad with Olive Del Mondo Honey Vinegar 

*

Pan roasted peaches in Vermouth and Star Anise Syrup with Mascapone
(we were too stuffed to finish this so find the recipe on HLTC soon!)

*

Selection of local shandies


Grace made some beautiful decorations including the Tissue Paper Tassel Garland and the Hand Cut & Printed Confetti for the table.

With our gathering being on a school night and both having to turn in before transforming into pumpkins, the night was over far too soon. 

With lots of hugs and plans for a final farewell get together in the air we hugged good night and marked the end of a perfect summer evening.