baking

Boston's Flour Bakery inspired Coconut Cream Pie

November 27, 2015

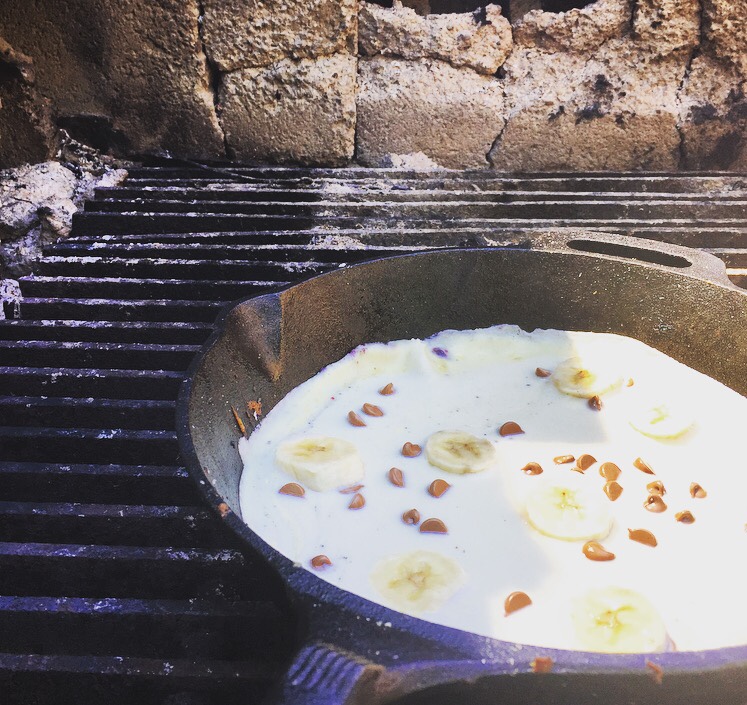
Our final Boston morsel was a quick breakfast at Flour Bakery. I've been trying to get here on every little trip to Boston I've been on but never ended up in the right neighbourhood(s).


We were doing an earlyish extrication on Saturday morning so wanted to grab something quickly rather than sit down to a brunch, meaning Flour was the perfect stop off en route home.

The breakfast sandwich was great but the hands down winner of breakfast was the Coconut Cream Pie... which is an essential part of a well balanced breakfast.


Normally when faced with a cabinet of deliciousness, some virtuous, martyr-ish part of me opts for the 'healthy' option. In a place like Flour that would still have been dam tasty, but this time I was on an all out, indulgent, last-day-of-vacay kick and order my cream pie with gusto.

And boy and I glad I did.

Even Charlie, who's eyes lit up at the prospect of a long awaited taste (we're talking years here) of Shoo Fly/Pecan Pie, admitted I had won breakfast with that creamy, coconutty slice of heaven.

Once back in my own (almost finished- updates coming soon!) kitchen, I knew the first thing on my 'try to make' list would be that coconut cream pie.

Consisting of a pastry crust, a coconut flavoured custard, and topped with whipped cream sprinkled with coconut flakes, there we're a couple of changes I wanted to make to the original recipe.


Instead of a pastry base I plumped for a graham cracker/digestive biscuit base, and to lighten up the custard I used half cream, half culinary coconut milk.

The Flour pie also used toasted coconut flakes to sprinkle on top whereas I left mine in their natural snowy state, preferring their flavour this way and also the pretty snow cloud look of the finished pie.

Ingredients:

Base-
Just over 2 cups/200g crushed graham crackers/digestive biscuits
1/2 cup/60g salted butter

Coconut custard-
1 cup culinary coconut milk- I use this one (not a paid link!) as it's nice and thick
1 cup of half and half/single cream
4 egg yolks
1 cup shredded coconut sweetened
2 tablespoons all purpose/plain flour

Topping-
1 & 1/2 cups whipping/heavy cream
1/2 cup shredded coconut, sweetened

Method:

Melt the butter, in the microwave or on the stove, pour into the crushed crackers/biscuits. You can crush the crackers/biscuits however you find easiest- hands down the way I find simplest is in a processor. It makes for a nice fine crumb and a lot less mess from exploding sandwich bag vs. rolling pin debacles.


Mix the butter into the crumbs until they are coated and look like wet sand. press into a pie dish, moulding them up the sides of the dish. Press down firmly so that the crumbs compressed together and won't just crumble apart.

Pop in the fridge to set for at least an hour.

Pour the single cream/half and half and the coconut milk into a saucepan, not on heat, and whisk together. Crack and separate the eggs, save the whites to make meringues or velveting chicken, plop the yolks into the coconut cream mixture and whisk in well.


Place the pan over a low/medium heat and bring to a gentle boil, stirring continually. When small bubbles start to appear at the outer edges of the pan and the mixture is steaming, add in the shredded coconut and keep whisking. Adding the coconut later makes the custard easier to whisk and heat evenly until it boils.

Keep the pan over a low heat, spoon a couple of tablespoons of the custard into a mug or ramekin and add the flour, whisk with a fork until it forms a smooth paste then add the paste back into the custard and combine. The flour will help thicken the custard more and help it set when it cools.

Continue cooking the custard for a further ten minutes, then pour into a bowl. Cover with cling film/saran wrap, pushing the plastic right onto the surface of the custard so it doesn't form a skin when it cools, and pop in the fridge.


When the custard is completely cool (you can hurry this along by spreading the custard on a large plate so it has more surface area), spoon it into the pie crumb crust and cover as before, chill for another hour.

Whip the cream until it is quite thick, thicker than you'd use to dollop over a dessert, you want it to hold its shape when a slice of pie is cut.

When the custard is set in the crumb crust, pile on the cream (this is a pie made of cream and cream so let's not hold back under the pretense of being health conscious eh?)

click to tweet


Finish with a sprinkle of coconut flakes- toasted or not, your choice and dive into a slice of utter indulgence.


eating

My Continuing Food Education: Texas BBQ at Sweet Cheeks Q, Boston

November 23, 2015

It's been a crazy year at Vine HQ. It's been a crazy three years if we're being really honest, and with December no looking as though it's going to let up, Charlie and I decided to take a little midweek break away somewhere local while we could both swing some time.

Boston, being just under an hour away was perfect for a mini-cation, we didn't waste time traveling which left more time for fun.... and eating.

We stayed at The Verb over in Fenway. A swinging sixties, rock and roll inspired hotel, part of me thought it was going to be too good to be true given the surprisingly reasonable room price. This isn't a review of the hotel, you can check out trick advisor for that, butIi'd whole heartedly recommend it to anyone wanting a funky place to stay in Boston, without breaking your budget or compromising on style.

Now to the food. Wow.

With only two-ish days in the city we wanted to make the most of what Boston's menus had to offer whilst seeing the city without needing to be forklifted home. I think we hit some of Boston's top spots, but there are so many more I'm desperate to get back to!


Thursday's lunch found us as Sweet Cheeks Q on Boyleston in Fenway, a convenient and entirely coincidental 3 minute stroll from our hotel.

Sweet Cheeks is all about Texas BBQ, smoked meats that aren't slathered in sauce, rather meltingly tender and succulent with their own slow smoked fats.

Led by Tiffani Faison (of Top Chef fame) and her memories of her childhood backyard 'the American south, north of the Mason Dixie', there is no way you're not getting excited about a place that's R&D included a life changing short rib.


The star of the show here really is the meat; from the impressive local, 'Never Ever' provenance (as in 'never ever' treated with hormones and rubbish), to the metal tray presentation: a scoop of coleslaw in one corner, a pile of sweet pickles in the other, and anything runny (like their incredible mac and cheese) confined to an enameled mug.

We ordered the brisket and the ribs, along with coleslaw, mac and cheese and a bucket of the most amazing biscuits that come with a whipped honey butter that are the perfect sweet counterpoint to the intensely rich, savory meat.

The BBQ sauce, one of three condiments set out on every table- the others a pickly vinaigrette and a spicy hot sauce, was so damn good we bought it. before we'd even finished our meal we had bought a bottle of that sauce and were wondering whether one would be enough.


Needless to stay experiments in backyard smoking are already filling my imagination, but in the meantime i'll be trying to recreate the delicious sweet pickles to keep my appetite sated until I can go back.


entree

Gluten Free Roasted Cumin and Coriander Chickpea and Carrot Salad

October 25, 2015


I did a similar recipe to this in the summer: Vegetarian Roasted Carrot, Coriander and Orange Cous Cous, but I'm heading to a party with a gluten free friend so wanted to change it up a little bit to give her some more dining options.

Chickpeas are a brilliant base for gluten free meals, they can make soups and stews thick and creamy, or add a crispy bite to salads, vegetarian burgers and falafel.

With us also being in a cooler season I wanted to make it a bit heartier, so eschewed the zesty orange in favour of earth cumin and rich honey.


Ingredients:

2 cans of chickepeas, drained
3 large carrots
1 tsp ground cumin
1 tsp ground coriander
a good glug of olive oil
2 tbsp  honey
salt and pepper
small bunch fresh cilantro/coriander leaf
about 100g/4oz fresh arugula/rocket leaves

Method:

Slice the carrots on a diagonal, it'll make them look more interesting and also give them sharp thin edges that'll roast up really nicely.

Throw all the ingredients (except the fresh cilantro/coriander and rocket/arugula) on to a large baking sheet and mix well. Pour over the olive oil and honey and either get your hands stuck in or use two spoons to tumble the ingredients together like you would toss a salad.


Spread everything out over the sheet and place in a preheated oven at 400F for 25/30 minutes, until the carrot are soft in the middle and the chickpeas are roasted golden brown.

Roughly chop HALF the cilantro/coriander leaves and with the arugula/rocket, make a lush green layer on a large plate or platter, leaving a well in the middle.

Once the carrots and chickpeas are completely cool, finely chop the remaining half of the cilantro/coriander and toss with the carrots and chickpeas.

Tumble the roasted carrot and chickpea mix into the well in the middle of the arugula/rocket bed to serve.


entree

Slow Cooker Beef Ragu as seen on The Rhode Show

October 23, 2015


I love cooking on The Rhode Show and have been really lucky to get asked back a few times! This morning I showed Michaela and Will how to put together a delicious slow cooked beef ragu.

After getting over my initial panic that tomato sauce + white t-shirt + forgotten apron = messy Holly, everything went pretty well, and if the clean plates of the cast and crew after filming were anything to go by, the dish tasted pretty darn good!

It's a perfect recipe for this time of year, it's comforting, versatile, (and with the help of a slow cooker) really simple to make.

Slow cookers are really good value kitchen appliances. A non programable one, with just a low or high setting can be picked up for under $20, whereas the programable timer models start at around $40. 


Ingredients:

Bottom round roast cut of beef 2 – 2.5lb
1 red onion
3 large cloves of garlic
28oz crushed tomatoes
1 glass red wine, about 200ml
1 tsp dried basil
1 tsp oregano
1 tsp parsley
1 bay leaf
Salt and pepper

Method:

Heat a heavy frying pan on a high heat, brown each side of the meat really well, paying special attention to the fat side.

Finely slice the onions and garlic, lay them in a layer at the bottom of the slow cooker.

When the beef is browned all over, remove it from the pan and place it on top of the onions. Turn out the heat under the frying pan then pour in the red wine. It will sizzle, this will help burn off some of the alcohol content quickly before it mellows in the slow cooker.

Mix the canned tomatoes, reduced wine, herbs and a generous seasoning of salt and pepper together then pour over the beef in the slow cooker.

Place the lid on the slow cooker and set to cook on LOW for 10 hours.

The finished ragu can be served as it is, over parmesan polenta or pasta; or enhanced with beans and spices to make a rustic chili; layered with pasta sheets and béchamel for a lasagna; or mixed with vegetables and topped with potatoes to make a hearty cottage pie.

*FOR ANYONE WANTING TO MAKE POLENTA AS SEEN ON THE SHOW*

Eeeeeek, so I managed to do the whole show without spilling anything on myself, cutting or burning myself (or anyone else for that matter), but I did make a little slip up when chatting about the polenta.

Use about 1 QUART (4 cups) of water, per CUP of polenta, not the cup to cup ratio I said on't telly... whoops.


hints

Holiday Season Entertaining Tips: As presented at The Lady Project, RI Girls Pint Out + Stock PVD Stocktoberfest

October 22, 2015


The Holiday season is fast approaching and whilst that brings with it the excitement and fun of gatherings and parties, it also brings with it the inherent stress of… gatherings and parties!

It might seem a bit negative to approach the prospect of welcoming guests to your home for a party, or having a spread ready to go for unexpected seasonal visitors with a plan of attack, but it does make it so much simpler, enjoyable, and ultimately, more likely to happen more frequently.

So my tips when preparing to entertain are:

The freezer is your friend.


This works whether you are hosting or a guest at a last minute event. Batch cooking when you do have the time to spare, say on a Sunday afternoon, or if you’re super motivated, a Saturday morning, can be such a life saver when it comes to feeding a lot of people in a hurry. It also has the added bonus of allowing you to make something a little more extravagant (and by this I mean wowing your guests with your kitchen prowess), without missing out on the party itself.

Some dish ideas:

-Large pans of lasagne (extra points for using disposable pans, less washing up means more time for wine), and a couple of baguettes stuffed with garlic butter.

-A basic beef mince sauce which can be jazzed up with spices and beans to become a chili; enriched with wine and served over pasta or polenta; or mixed with carrots and peas then topped with mashed potato to become a quick cottage pie.

-Baked potatoes. Microwave your potatoes until soft, then rub with olive oil, salt and pepper, wrap them in cling film and throw them in the freezer. When you need them, pop them back in the microwave to defrost and heat through before finishing in a very hot oven for 10 minutes to crisp up the skins. Baked potatoes are a super easy dinner for an unexpected group as you can lay out a whole bunch of different toppings and leave the final flavour decisions up to the diner!

-Cookie dough, cinnamon buns and croissants.
Make ahead, freeze. At the sound of the doorbell throw them in the oven, brew up a pot of coffee, and seriously impress your guests.

Size Matters.

When it comes to entertaining go large. Or very small.

It’s amazing how sizing can change up the ‘specialness’ of food.

The big time-


If you want to serve chicken, don’t do breast or thigh portions, do a whole chicken and spatchcock it. Roasted whole with golden skin, surrounded by flavourful roasted aromatics like halved whole lemons and garlic bulbs will always be a show stopper.

If you’ve got fish on your menu, cook it whole (or a whole side, like salmon). Dress it with generous bunches of dill and parsley (which are cheap) for a dramatic centerpiece.

Huge great big pizzas, like as big as you can fit in your oven, will make anyone hungry! Making  your own pizza isn’t as tricky as it sounds (especially if you follow tip 1, make a bunch of dough and keep it in your freezer!). Don’t worry about making them perfectly round (i’m a fan of a wonky pizza!), just make them BIG. Get the biggest sheet pan your oven will take and go to town, it’ll look awesome.

Itsy bitsy teeny weeny-


Instead of making one tart, pie or quiche make 20, with exactly the same ingredients you would have used before.

Use a cupcake pan and a round cookie cutter to make your mini crusts, stuff them with your regular filling and say hello to cutlery- and crockery-free entertaining.

Stuff on toast suddenly becomes completely cocktail worthy if your toast is tiny. Either thinly slice a baguette to make bite size toast rounds, or get your cookie cutter out again and go mad on a regular loaf. Toppings such as avocado, smoked salmon, cream cheeses, pickles and cured meats look really fancy on tiny toast.

Spoil your guests with a selection of desserts… by cutting up a big one and offering them as dessert canapes. If you’re doing a plated dinner, choose three different desserts (a chocolate cake, a lemon tart and a cheesecake are a winning trifecta) and serve a trio… looks hella posh.

Keep it simple.

It’s easy to overthink entertaining, over cater and massively over stress yourself out. The simple fact is, your guests are here to see you and spend time with you so don’t miss out by being stuck in the kitchen.

A good rule of thumb is that the more people you are expecting, the fewer things you should plan to prepare. That’s not to say you should ignore your dietary specific friends or those with little ones just choose options that give the best choice with the least effort.


-Jacket potatoes with a range of toppings like cheese, bacon, sour cream, spring onions, garlic cream cheese, chili con carne if you have time to make it or baked beans if you’re reaching for something in a can!
-Self serve brunch bagel bar with a platter of smoked salmon, cream cheese and veggies; or a waffle bar with a batch of waffle batter ready to spoon into the iron and syrups, fruit, chocolate chips and whipped cream to top them with.
-Mac and cheese with topping options like ham, roasted veggies, and crunchy bread crumbs
-Soups, have two soup options warm on the stove or in a crock pot (simple crowd pleasers like tomato and chicken noodle) and a platter of simple sandwiches (roasted beef, chicken salad, ham, cheese, egg salad etc) using a range of breads (white, wholemeal, rye)

Everyone loves food.

When you’re the guest it’s always nice to bring something to thank your host, and something homemade always feels a bit more special.


Some simple homemade edible gifts, that you can actually make multiples of in one go so you’re ready for any last minute invite, are:

- Infused sugar, put a whole split vanilla pod, a cinnamon stick, star anise, orange or lemon peel into a jar with white sugar for a delicious baking ingredients or hot drink sweetener.
-Flavoured olive oil, place a sprig of rosemary, a handful of squashed garlic cloves, or a whole chilli split lengthways into a tall bottle and cover with olive oil for a tasty gift.
-Cookie baking kit, mix together all of the dry ingredients for a batch of cookie dough, include nuts, chocolate chips or flavourings if you like, pour them into a mason jar or baggie wrapped in a nice tea towel, tie a cookie cutter and tag with baking instructions to the package with a ribbon.


breakfast

Campfire Pancakes: A New Hampshire Getaway!

August 10, 2015

This past weekend I was super lucky to get to re-live the exceptionally epic two (and a little bit) days getaway that is Camp Mead.

Due to the generosity and awesomeness of my very good friend and her lovely parents, this past weekend was spent lakeside, soaking up the New Hampshire sunshine, drinking far too much beer and generally living it up rural style.


Last year I cooked up a huge Chili con Carne over the flames to feed the hungry campers, the final dinner made even tastier by the back drop of glittering Swaines Lake in Barrington, and our appertites encouraged along nicely by a days messing about in the water and lounging in the sun.

Campfire cooking, to me, is as much about the experience of standing over a crackling fire and wrangling hot, heavy cast iron as it is about the finished dish. Everyone's slight pyromania and enthrallment at the dancing flames embellished by the aroma of cooking food and the back to basics rawness of it all.


This year I wanted to try my hand as something for breakfast, and being an American staple I knew I wanted to whip up some pancakes flavoured with some fruit and chocolate.

Though our camp was a positive 'glamp' with a shower equipped bathroom built in the garage next to out camping spot, the kitchen is authentically outdoorsy and consists of a near 50 year old fire pit/grill- with a better view than (I estimate) 90% of domestic kitchens.


Knowing this I whipped up the batter the night before we set off, adding a little extra milk to allow for the invariable thickening that would happen over night in the fridge.. oh yes, we also had a fridge in the garage.

I use this recipe ratio:

Ingredient:

1 1/4 cup Whole Milk
1 1/2 cup All Purpose/Plain Flour
1 egg
1 teaspoon baking powder
Salt

I multiplied this recipe by 5 to make half a gallon of mix which kept the thirteen of us fed over two mornings.

I also brought a pint of fresh blue berries, chocolate chips and a few bananas for toppings.

I don't use sugar in my basic pancake batter because I like to mix up my toppings and fillings between sweet and savoury, plus the caramalised fruits always add enough sweetness


To cook the pancakes I let the cast iron skillet heat up on the grill surface then threw in a little margarine, I used margarine (or buttery flavoured spread) intentionally instead of butter just because I knew I was working with a heat that was tricky to regulate or change quickly, which could lend itself to burnt butter very quickly. Another option would be to use ghee which would give an AMAZING flavour, I'm considering another camping trip just to do this....

 After the fat was melted and sizzly, I poured in enough batter to cover the bottom of the pan and, using a kitchen towel, lifted the pan to swoosh the batter around the pan so it was even.

I then threw on the toppings, I was a big fan of the blueberries as they softened a burst as they cooked, making their own syrup. Though i'm not personally a huge fan of bananas I couldn't help but sneak a taste of Charlie's pancake as they looked so tasty all golden brown and caramalised!

The choclate chips were also popular amongst the pancake devourers- some people even went for the trifecta, a super fancy way of saying we threw in everything we had and it was damn good!

The cast iron pan's weight made pancake flipping impossible (which I was secretly pretty happy about because I'm RUBBISH at pancake flipping..  I think it's a confidence thing). Once the top of my pancake was set, after a couple of minutes, and I could prise the edges away from the pad I'd nab the pan off the grill and set it on the brick side of the fire pit to do a quick flip (very quick as I only had a plastic spatula... duh, thanks kitchen renovation madness!)then return the pan to the grill to finish off the other side for 3 or 4 minutes.

There were no frills with presentation, hungry camper don't worry too much about that sort of thing!

Check out my lakeside campfire pancake cooking session in the video below and on my YouTube channel!


everythingelse

Kitchen Garden Update: Peas, Beans and Some Teeny Weeny Leeks

July 23, 2015


My garden has been growing!

All this summer weather and a serious watering schedule has resulted in some actual real vegetables I can pick and eat.. I know!


So far the peas have been the stars of the show, those fat little pods are just bursting with sweet summer goodness (which are going to be part of a delicious summer pasta recipe on the blog shortly!)

The beans are taking notes from their prolific pea neighbours and starting to look like real, actual beans... which is nice.

I think I'll be sauteing these up with some panchetta and serving them warm with salad when they are ready to pick.


My leeks are looking lovely and orderly if a little small. I'm hoping they will get a little bigger but even if I end up with baby leeks they will be very happy tucked up with some strong cheddar in a flaky pastry tart!


hints

Video Tip: How to Peel an Avocado

July 12, 2015


Avocados, they may be delicious but they can be fiddly little blighters when it come to cutting, de-stoning and scooping.

Scooping also means you may loose out on optimal nutrition from the very dark green flesh nearest the skin, which is often what gets left behind if a spoon is your avocado de-bagging weapon of choice.


Find more helpful kitchen tips and tricks over on my YouTube Channel!

baking

4th of July Shortbread Star Cookies- With Strawberry and Blueberry Jam Filling

July 04, 2015


Whilst I get the irony of a Brit making a British inspire recipe to celebrate the July 4th, I wanted to make something that honored the stars and stripes as my adopted homestead.

Shortbread is really easy to make and exceptionally delicious. Traditionally Scottish rather than English, I am borrowing this tasty treat from my Celtic neighbours and filling it with the jammy colours of America.


Ingredients: Makes 16 stars

For the shortbread-
1 1/2 cups of salted butter
1 1/2 cups of white granulated (US)/ caster (UK) sugar
3/ 12 cups all purpose (US/ plain (UK) flour
cold water

For the filling:
Use this fresh jam recipe or your favourite jam


Method:

Make sure that your butter is well chilled and very hard before starting to make shortbread. The key to a good short bread is that is it 'short', which in real money means crumbly and not chewy. This crumbly texture is gained by not overworking the dough and keeping the mixture as cold as possible. If the butter melt and 'soaks' into the flour it becomes a bit paste like and does not make for good shortbread.

Chop the butter into half inch cubes and tumble into the sifted flour, shake over the sugar then use your finger to rub the butter into the flour to make breadcrumbs. If you are making these on a hot day or you have particularly warm hand, it's a good idea to run your hand under a cold tap for a few moments prior to starting this, though make sure you dry them really well. Another tip is to pop the mixture into the fridge every few minutes to re-chill the butter if it starts getting a bit melty.

When you have fine bread crumbs that resemble the texture of wet sand, trickle a very small amount of water into the centre of your crumbs and work together to form a dough. You want to use as little water as possible and work the dough as little as possible. The amount of water you use will depend on so many factors including the climate, flour type and temperature but it's usually no more than a couple of table spoons.
Again, be sure to use cold water so that it doesn't melt the butter.


When you have your dough, roll it out on a lightly floured surface to about 1/2 inch or 1cm thick. Cut circles in the pastry that are about 3 1/2 inches or 10cm in diameter, I used a martini glass for lack of a suitable cutter!

To make the stars, pinch the side of the circle together at 5 equal point around the rim of the pastry circle. Dab a little water on the dough to help them stick well.

Transfer your stars onto a well greased baking tray and fill each one with about a table spoon of your jam.


When this is done, pop the trays into the fridge. Further setting the butter will help the stars keep their shape when they are baked in the hot oven.

Bake in a preheated oven at about 320F for 10-15 minutes, you wanted them to be a pale golden colour but not brown.

As I said in the jam recipe instructions, the jam will become richer and stickier in the heat. Let the stars cool after baking and serve up as part of a 4th of July picnic!

(or scoff them all in the safety of your kitchen where no one else can get them!)